WandaLandQuilts
Making Memories Through Quilts
Tote Bag Pockets
Alright, I get it, some sewing projects are not as exciting as others. But then again, it depends on who you are. I have a favorite tote bag that I carry to work every day – carries my planner, journal, coffee, umbrella, cell phone charger cord, small tablet of paper and a pencil (I write notes to myself), shoes (I wear my running shoes from the parking lot to the office), and other miscellaneous stuff that girls carry. So what do you do when your tote bag doesn’t have pockets? Add them yourself! I got this idea off a Martha Stewart (don’t ya just love her?!) website. I went to Home Depot (shameless plug for one of my favorite stores) and bought a 77 cent apron, cut the ties off it, and sewed it into the tote bag. Perfect! Well, Martha Stewart said to use the ties to make bows to put around the tote bag handles so you can move the pockets from one bag to another. Well, I’m not much of bow-kind-of-girl so I just sewed the darn thing in there. If my other favorite tote bag needs pockets, I’ll buy another apron. So, a little advertisement for Home Depot, but let me tell you – these tote bag pockets are handy as a pocket on a shirt. Pun intended.
Week 23.
Flannel Square Quilt
Wow – it’s been awhile since I posted – somehow life gets in the way. Isn’t that great? 🙂
I’ve been working on several projects, so let’s catch up.
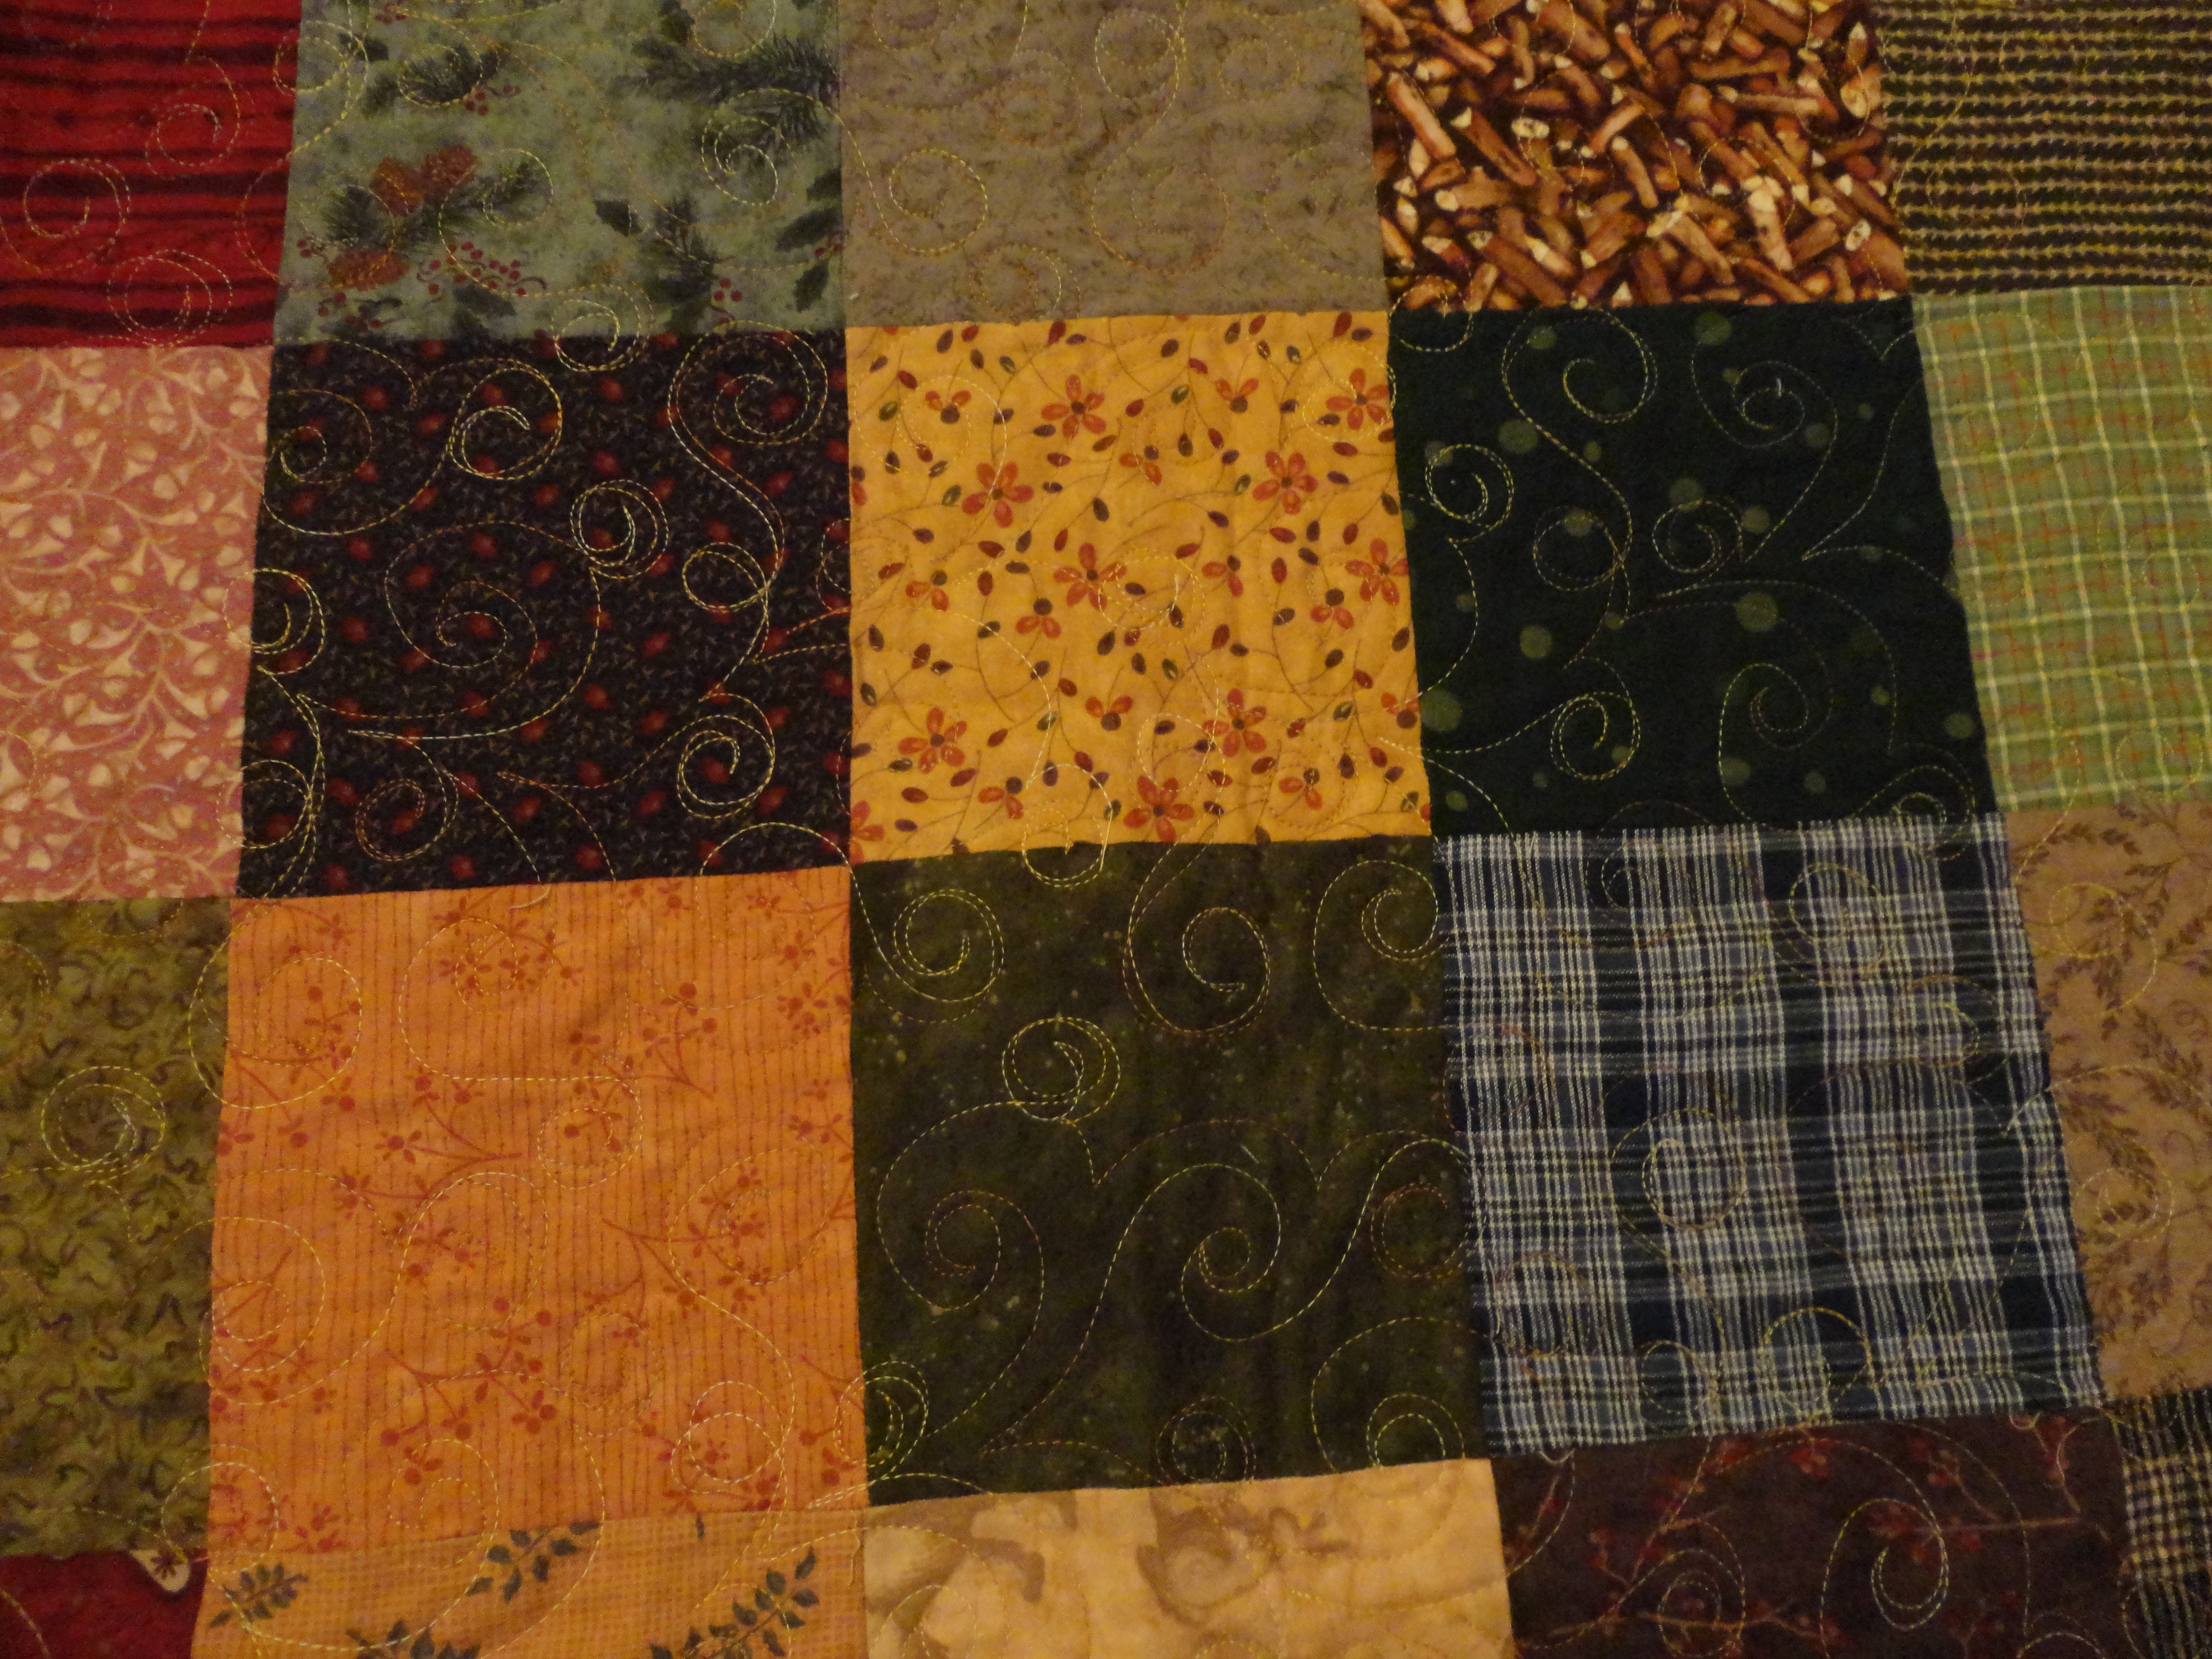
This is a queen size quilt that’s made of flannel squares. That may not sound too amazing, but this is something I pulled from my UFO’s (Un Finished Objects). When I pulled it out of the box, it was pieced and layered with a piece of white flannel as the batting and a red/black plaid flannel as the backing. Three layers of flannel – thin but very warm! So when did I piece it and layer it? One of the mysteries of the world. Ah, but there was a catch, it didn’t line up correctly. The batting and backing weren’t quite the same size as the top. So, do I un-layer it and line it up correctly and add in pieces to make the backing the same size as the top? No way! Cut off 3″ from each side and quilt it! The thing about UFO’s – get them done and move on. So I put it on the quilt frame and quilted a beautiful swirl design in gold thread. That really added movement to the squares of flannel. This is currently on our bed and let me tell you – that sucker is heavier and warmer than it looks! And my husband loves it!
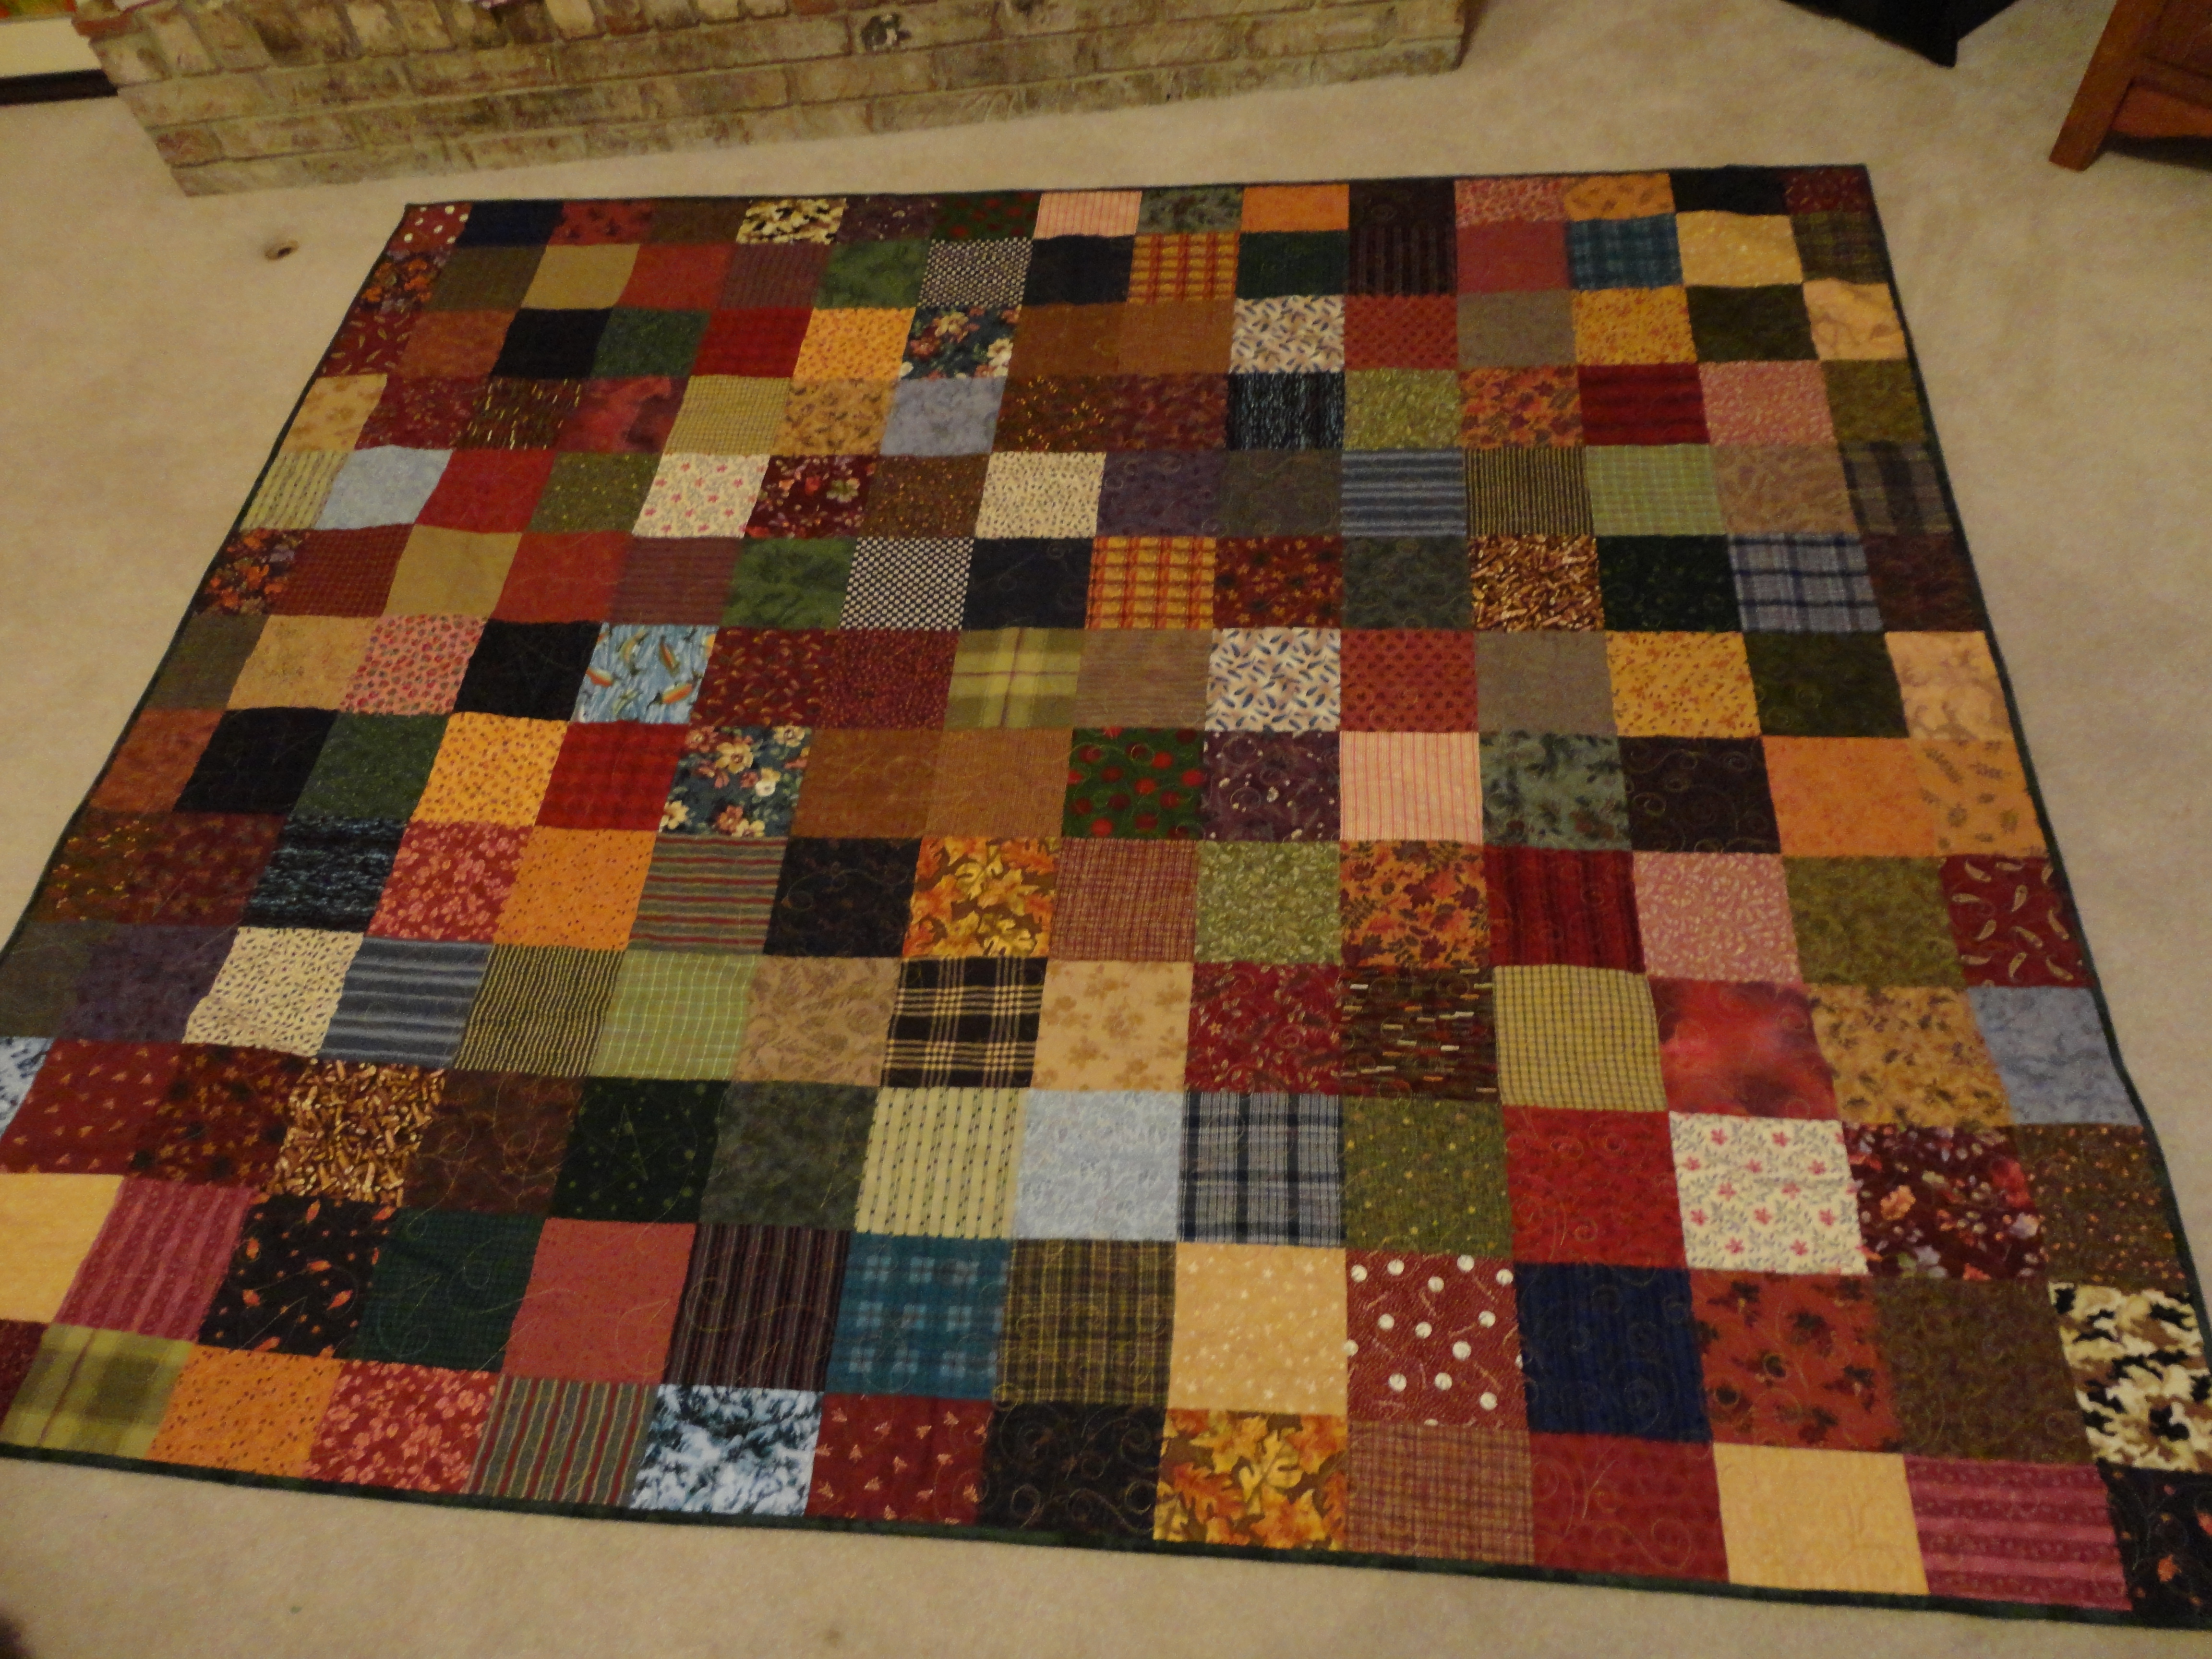
For those of you keeping track, this is week 22 of my 52 week challenge. And just to think about it, I may start that 52 week challenge again next year – but better prepared!
Zippy Strippy Quilt
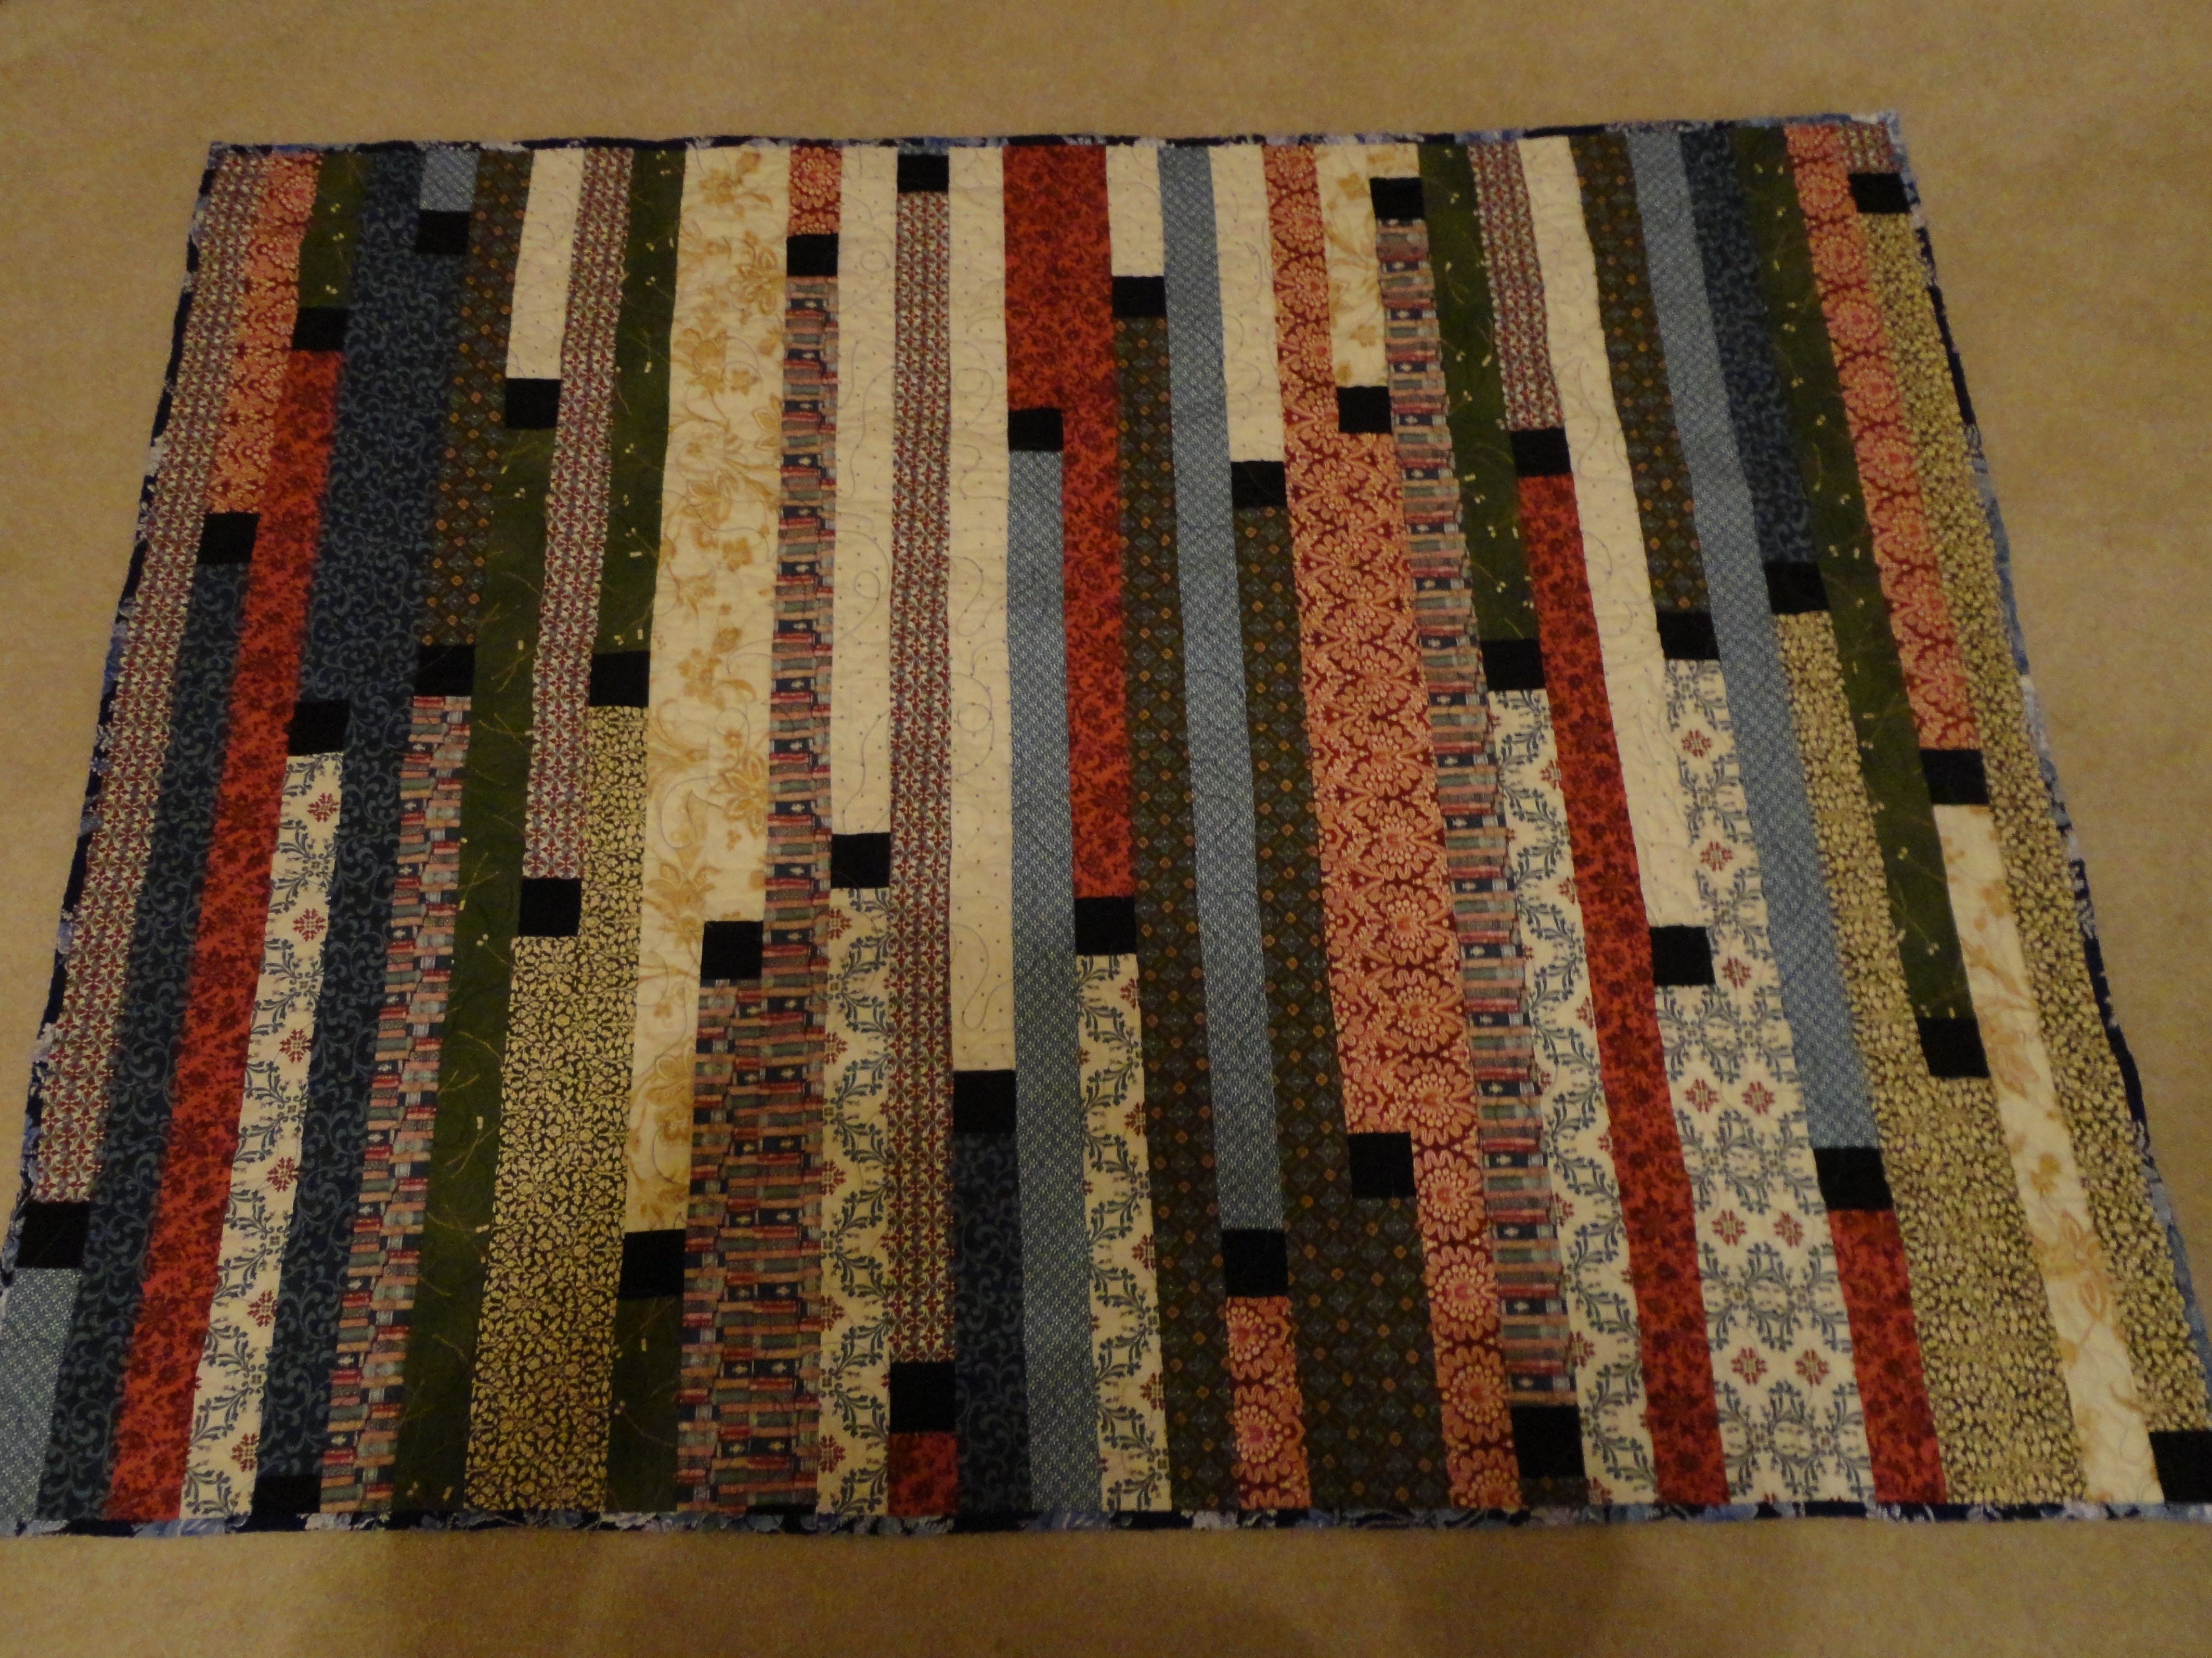
This is a Zippy Strippy quilt or otherwise known as a Jelly Roll quilt or a 1600 quilt. Sometimes fabrics are sold as 2.5″ strips (called a Jelly Roll because they are all rolled up and look like a jelly roll) so you can just sew them together end to end (surprisingly they total 1600″), then just fold them back onto itself and sew again. Actually, if you really want to know more just get on YouTube and search for Jelly Roll Race and watch for yourself. Anyway, I put a black square inbetween my strips to add a little more character. It doesn’t take very long to put one of these together and they are really pretty. Always nice to curl up with on the couch to read a book or watch tv.
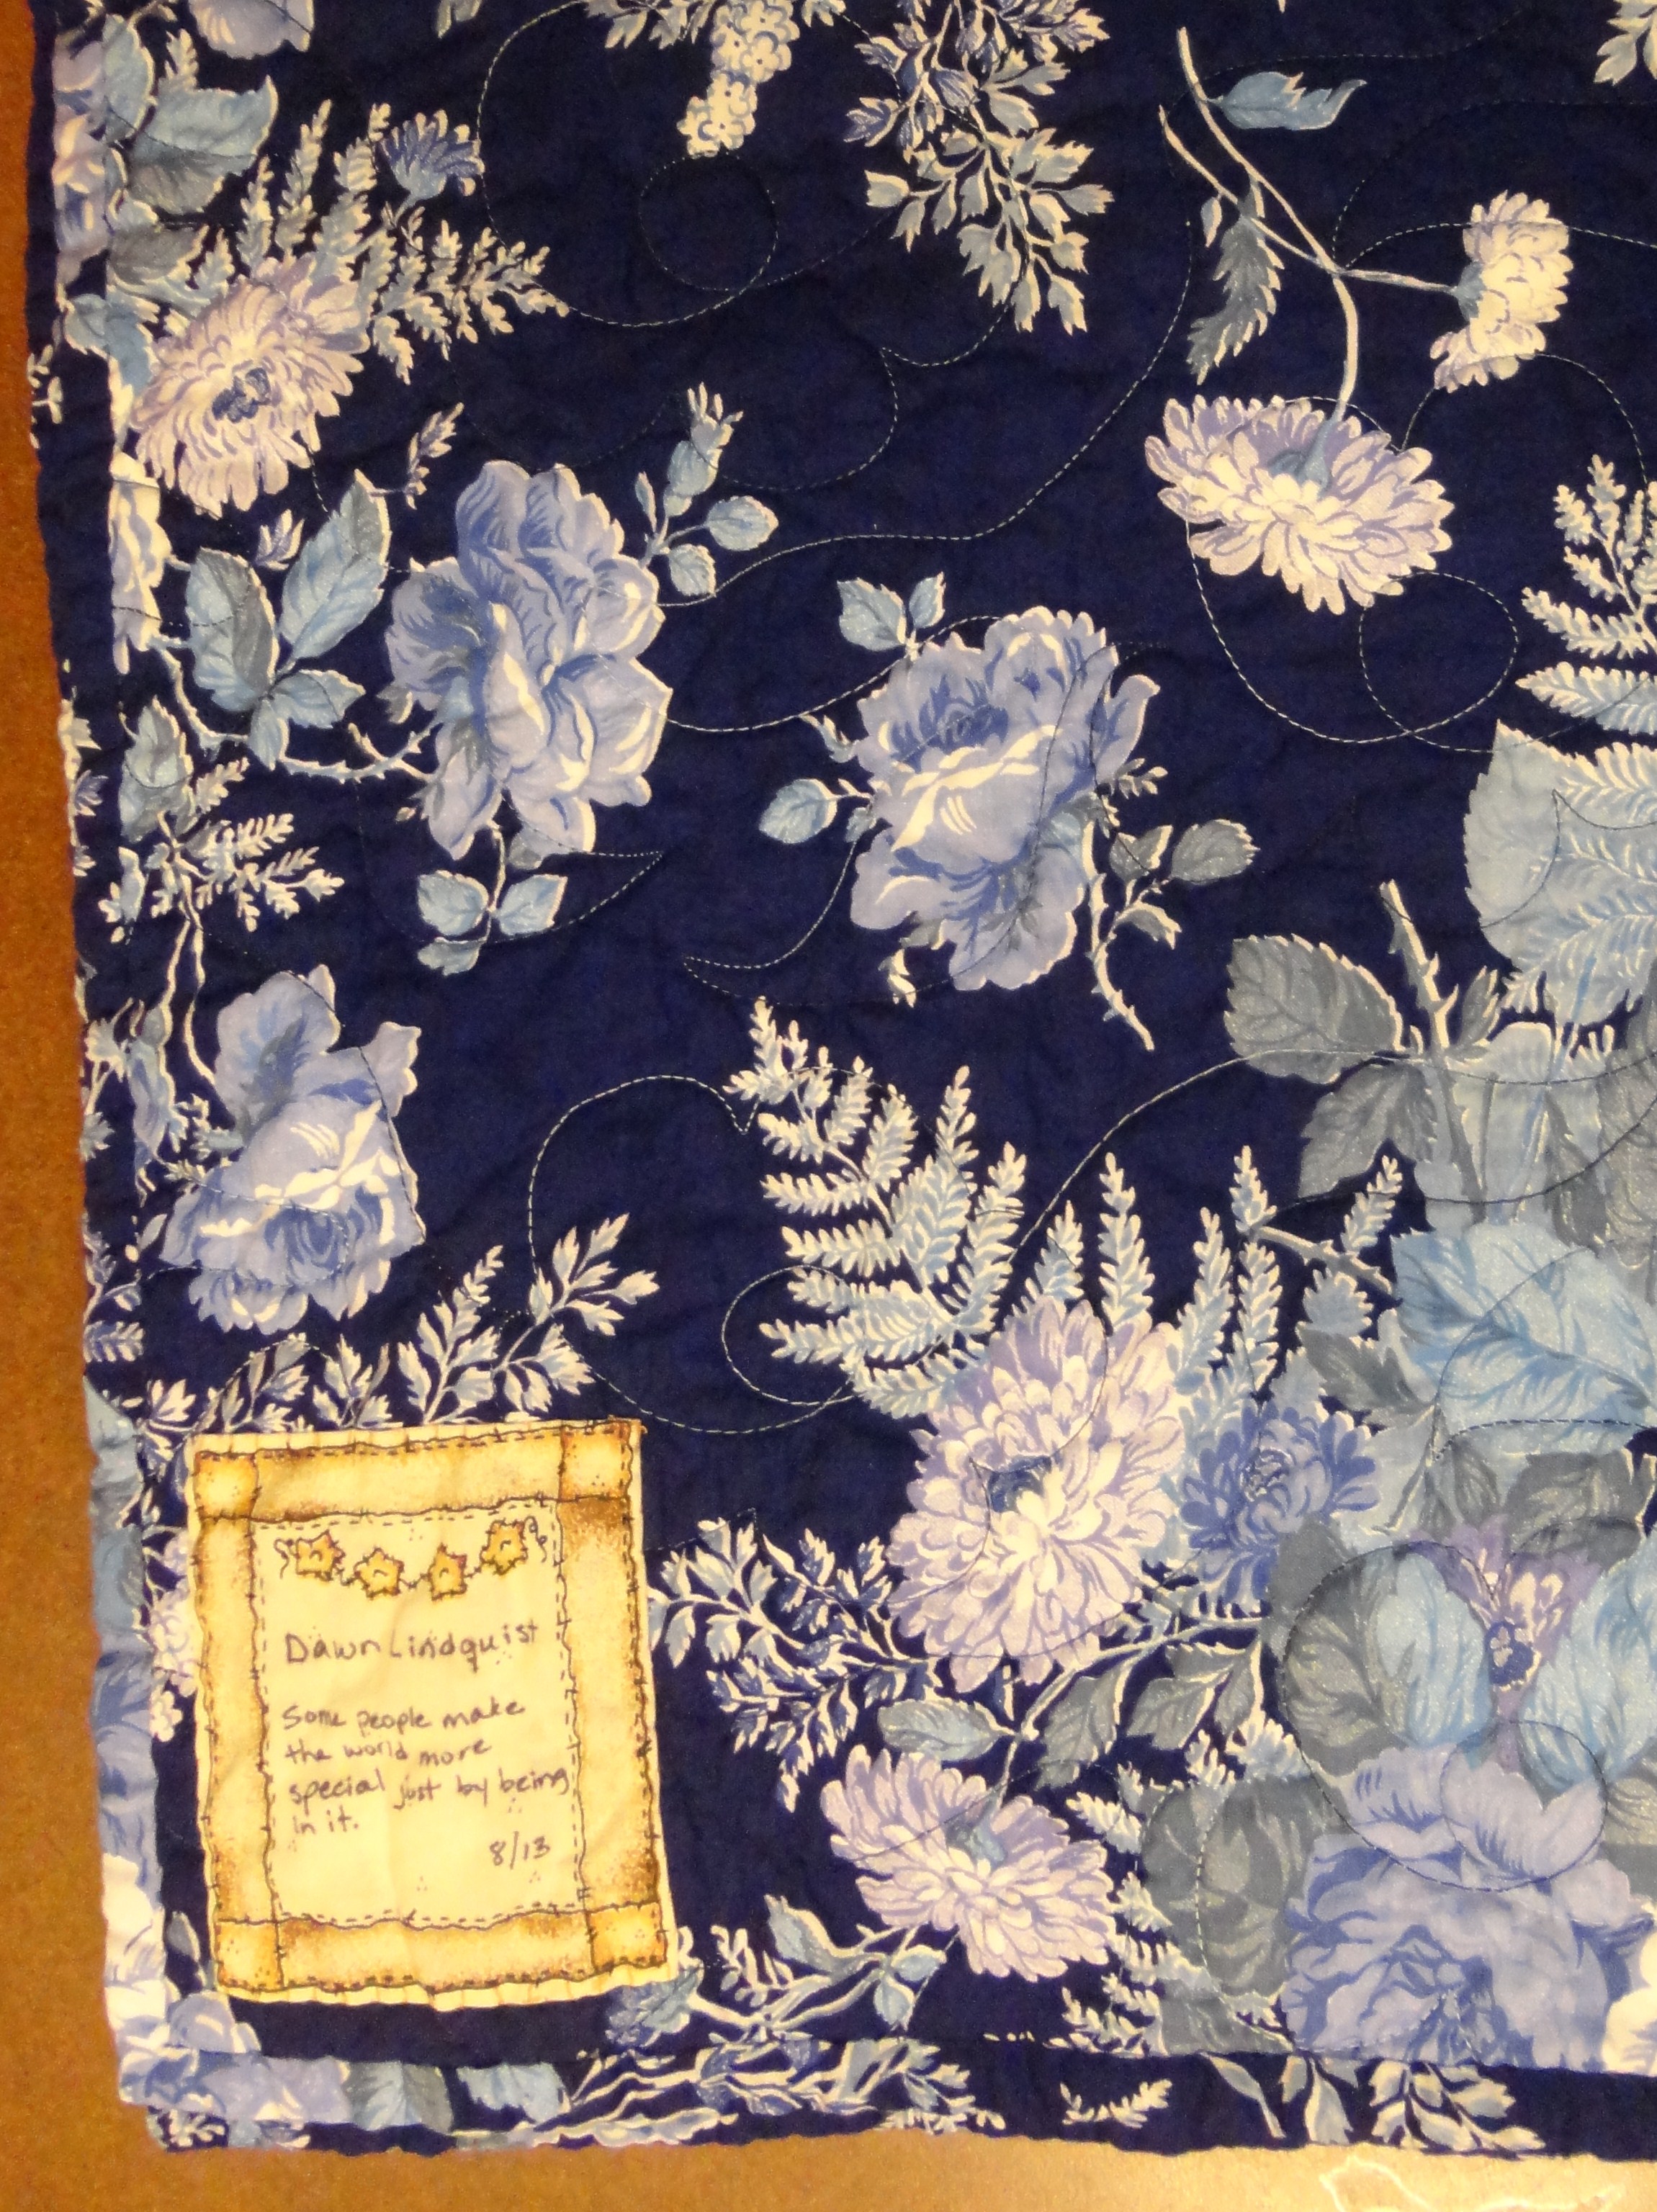
And here is the back…I tried to use up some of my ‘fabric stash’. Its beautiful but I still have way too much fabric left (is it possible to have too much fabric?).
Fun Projects to Make on a Saturday
It’s not very often that I have a free Saturday, so I made the most of it! Here are some projects I’ve recently made.
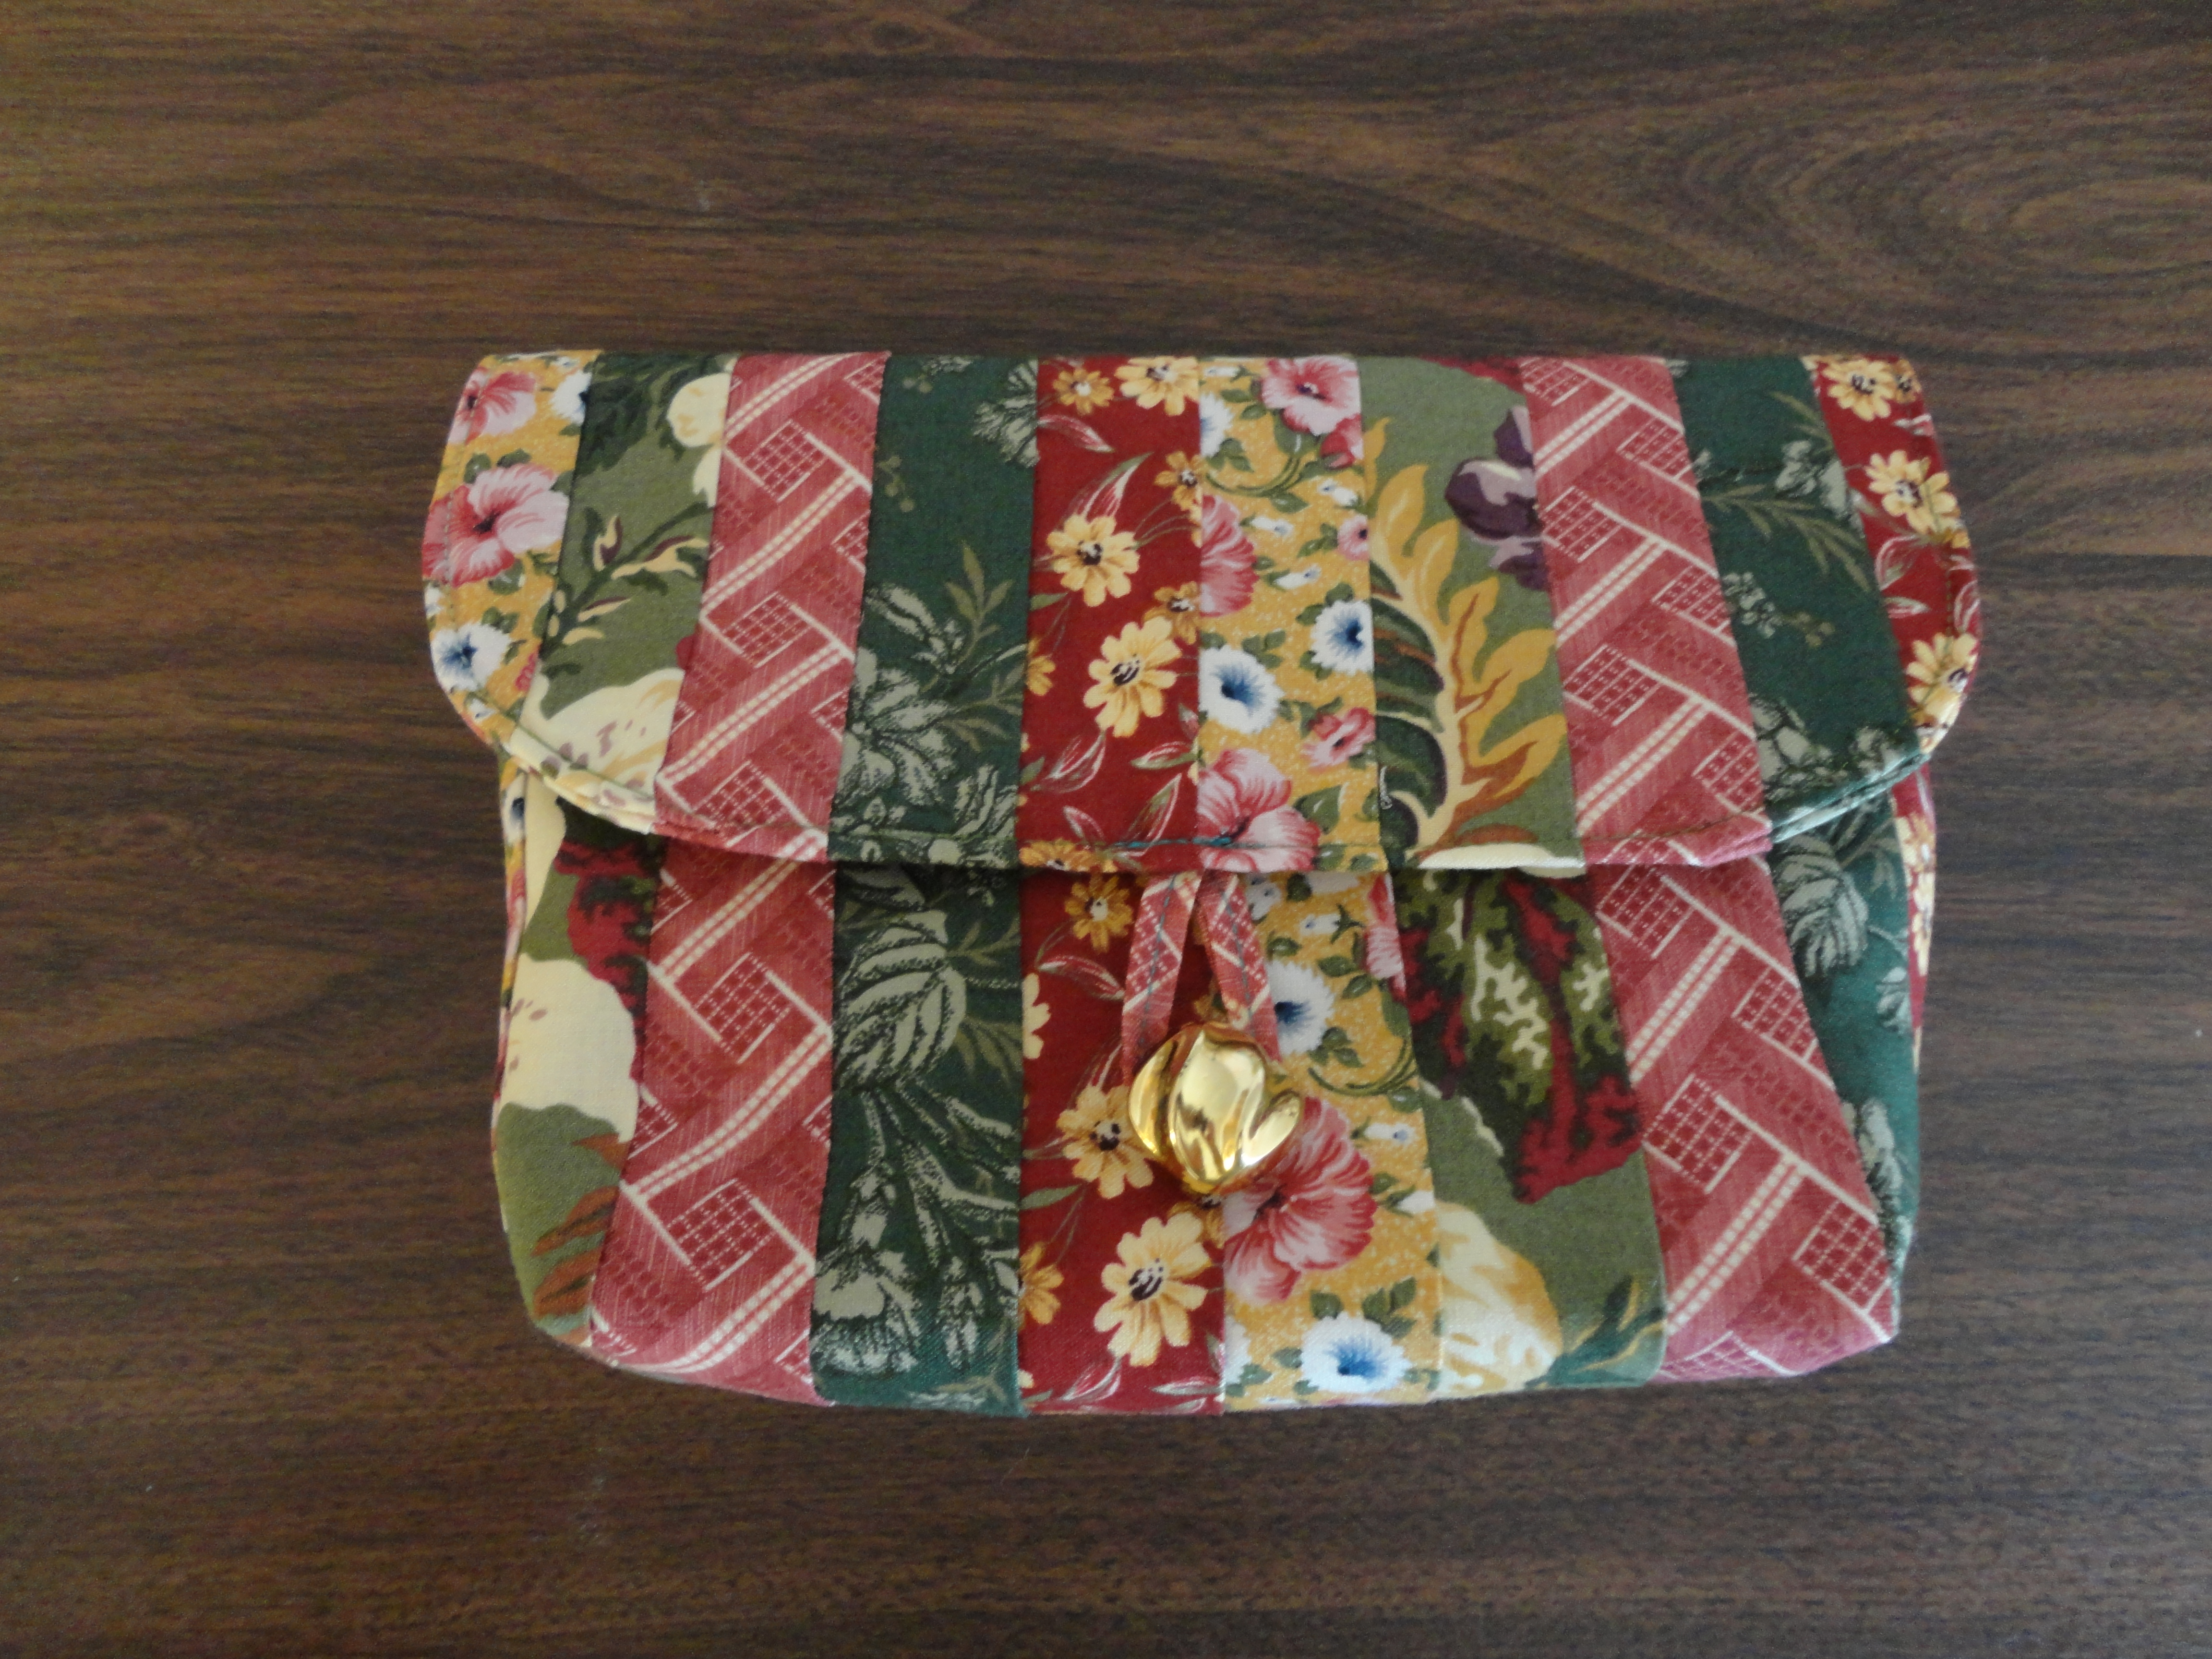
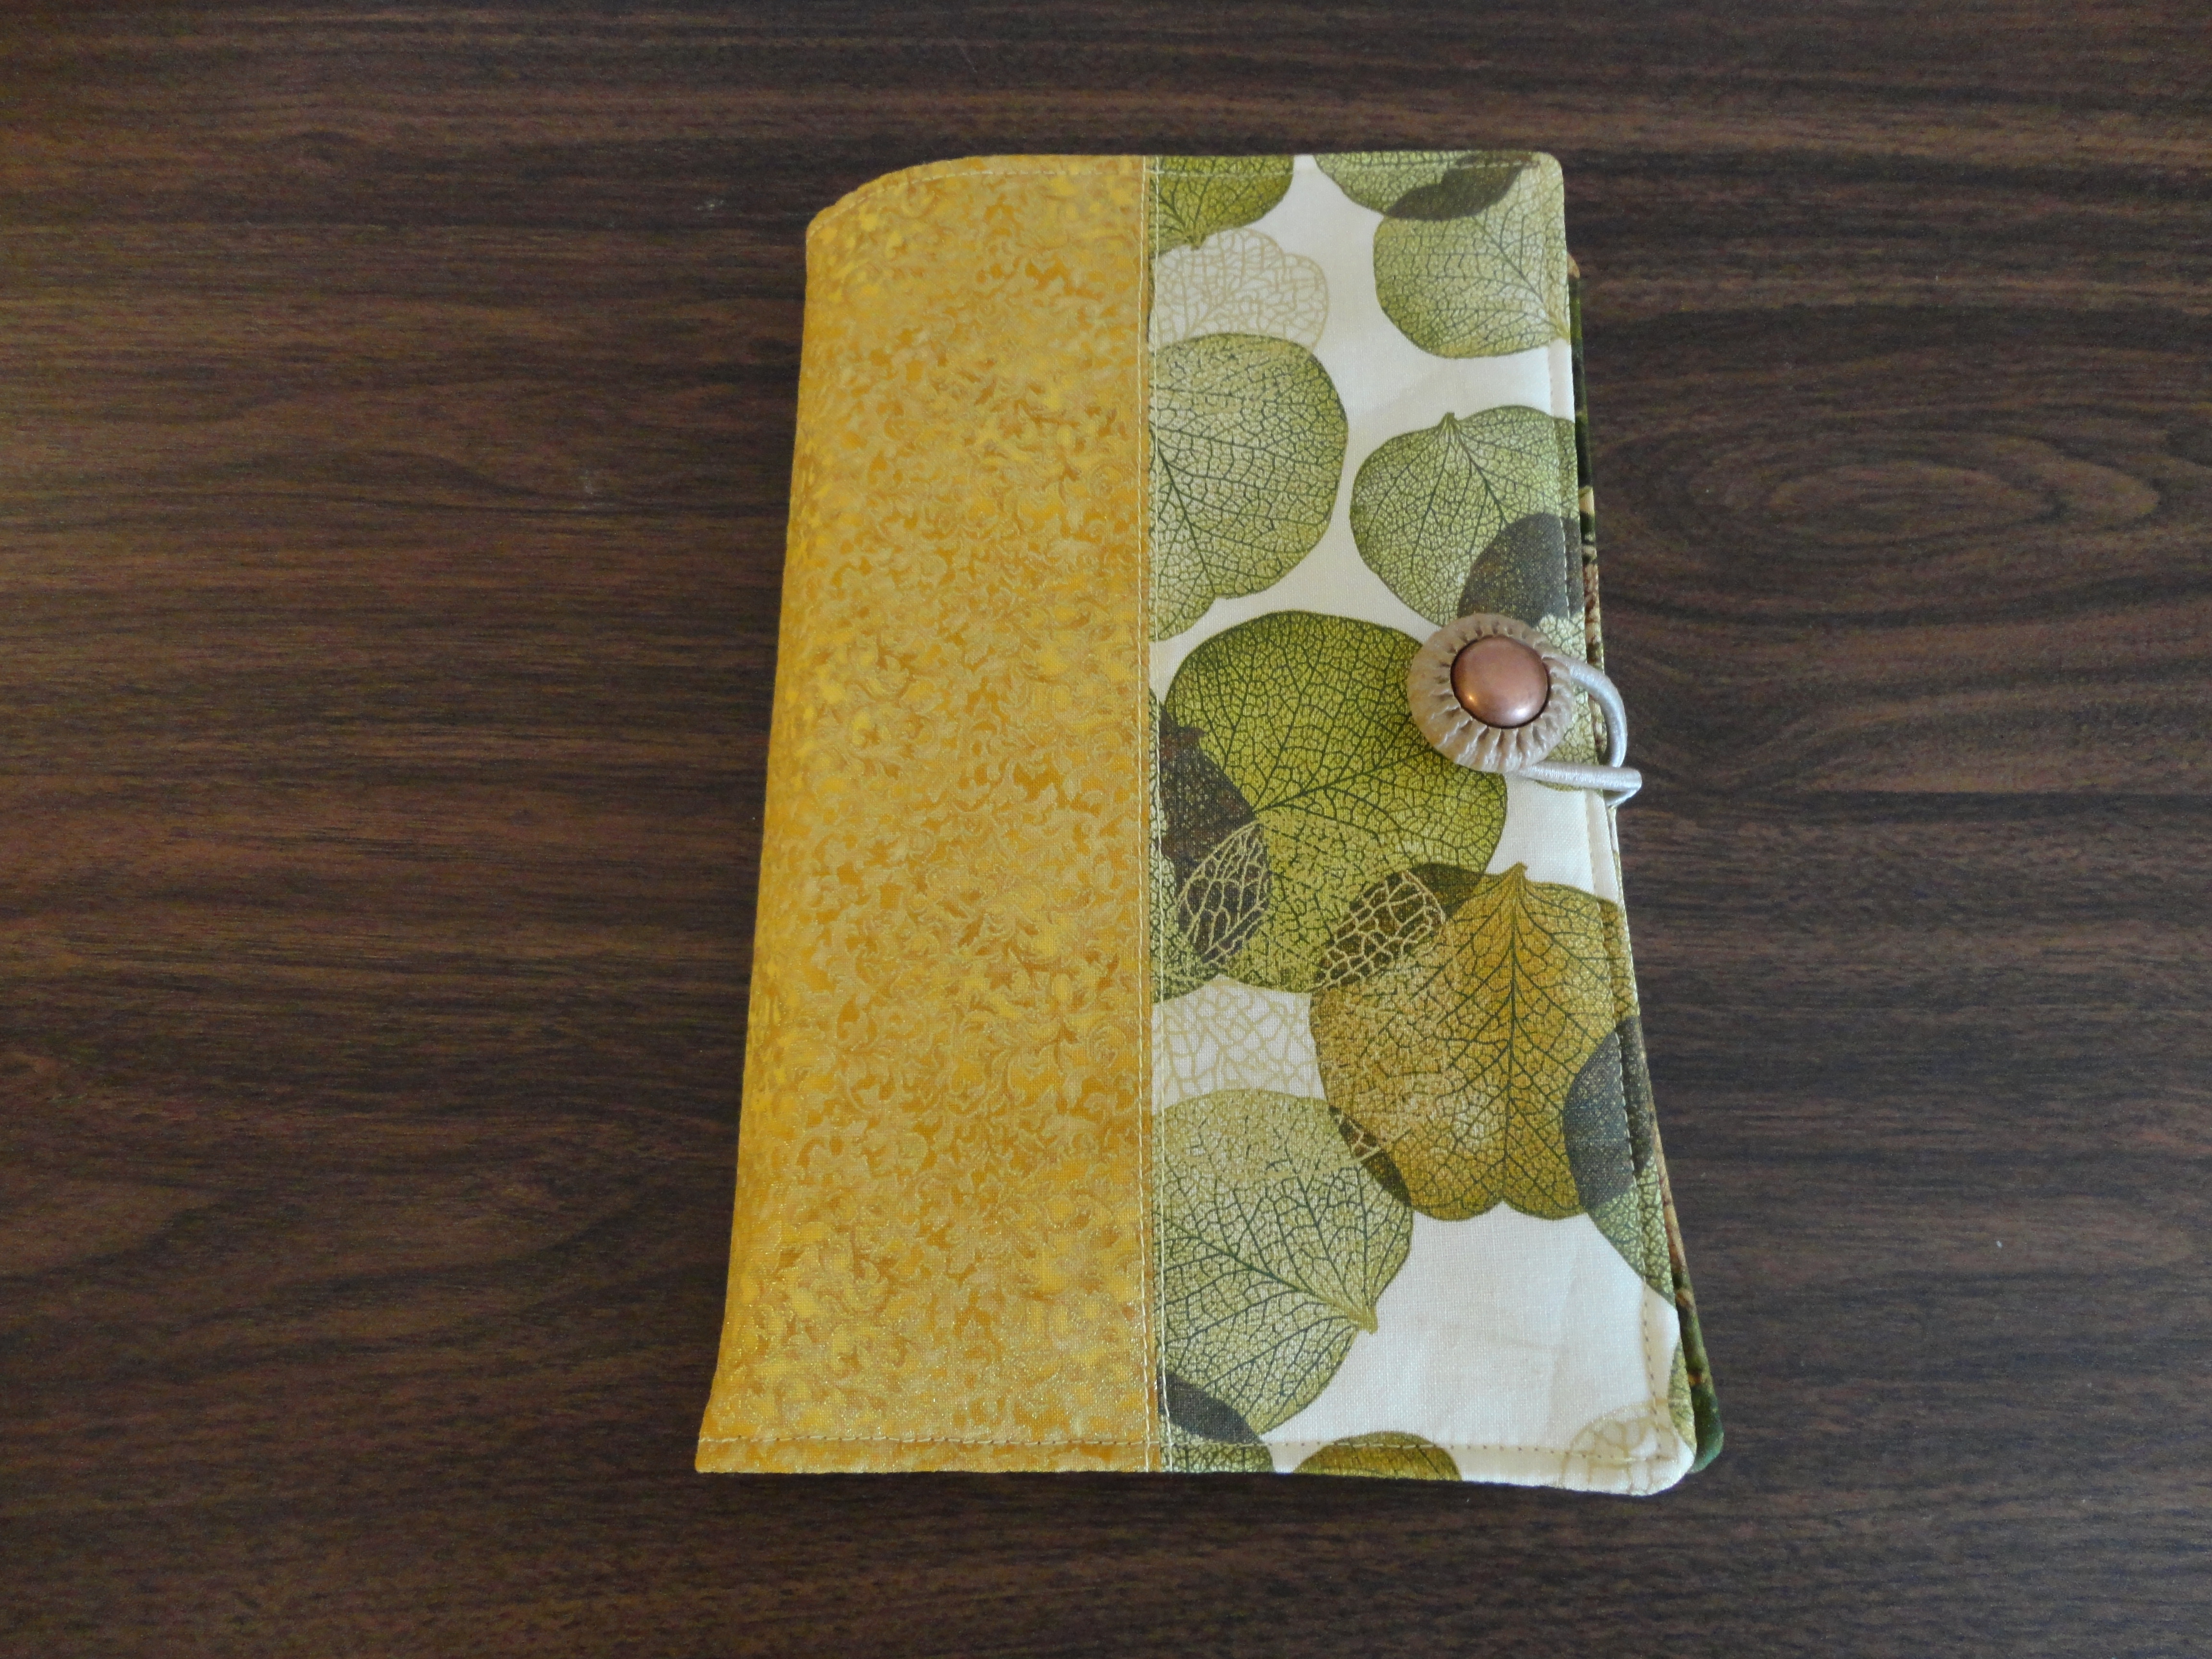
This is what I’m calling a Self Lining Purse. Usually quilted purses (or a clutch purse) are lined, but at a quick glance at the directions for this there was no lining fabric specified. The directions were a bit confusing – usually I can read through them and picture it in my head, but not these. So, I just plunged in and just did it. Magic! Sew it this way and that way and turn it all about – and it’s a lined purse! How cool is that?! Naturally, I’ll tweek the pattern a bit and make it a little better, but you can be I’ll be making more of these.
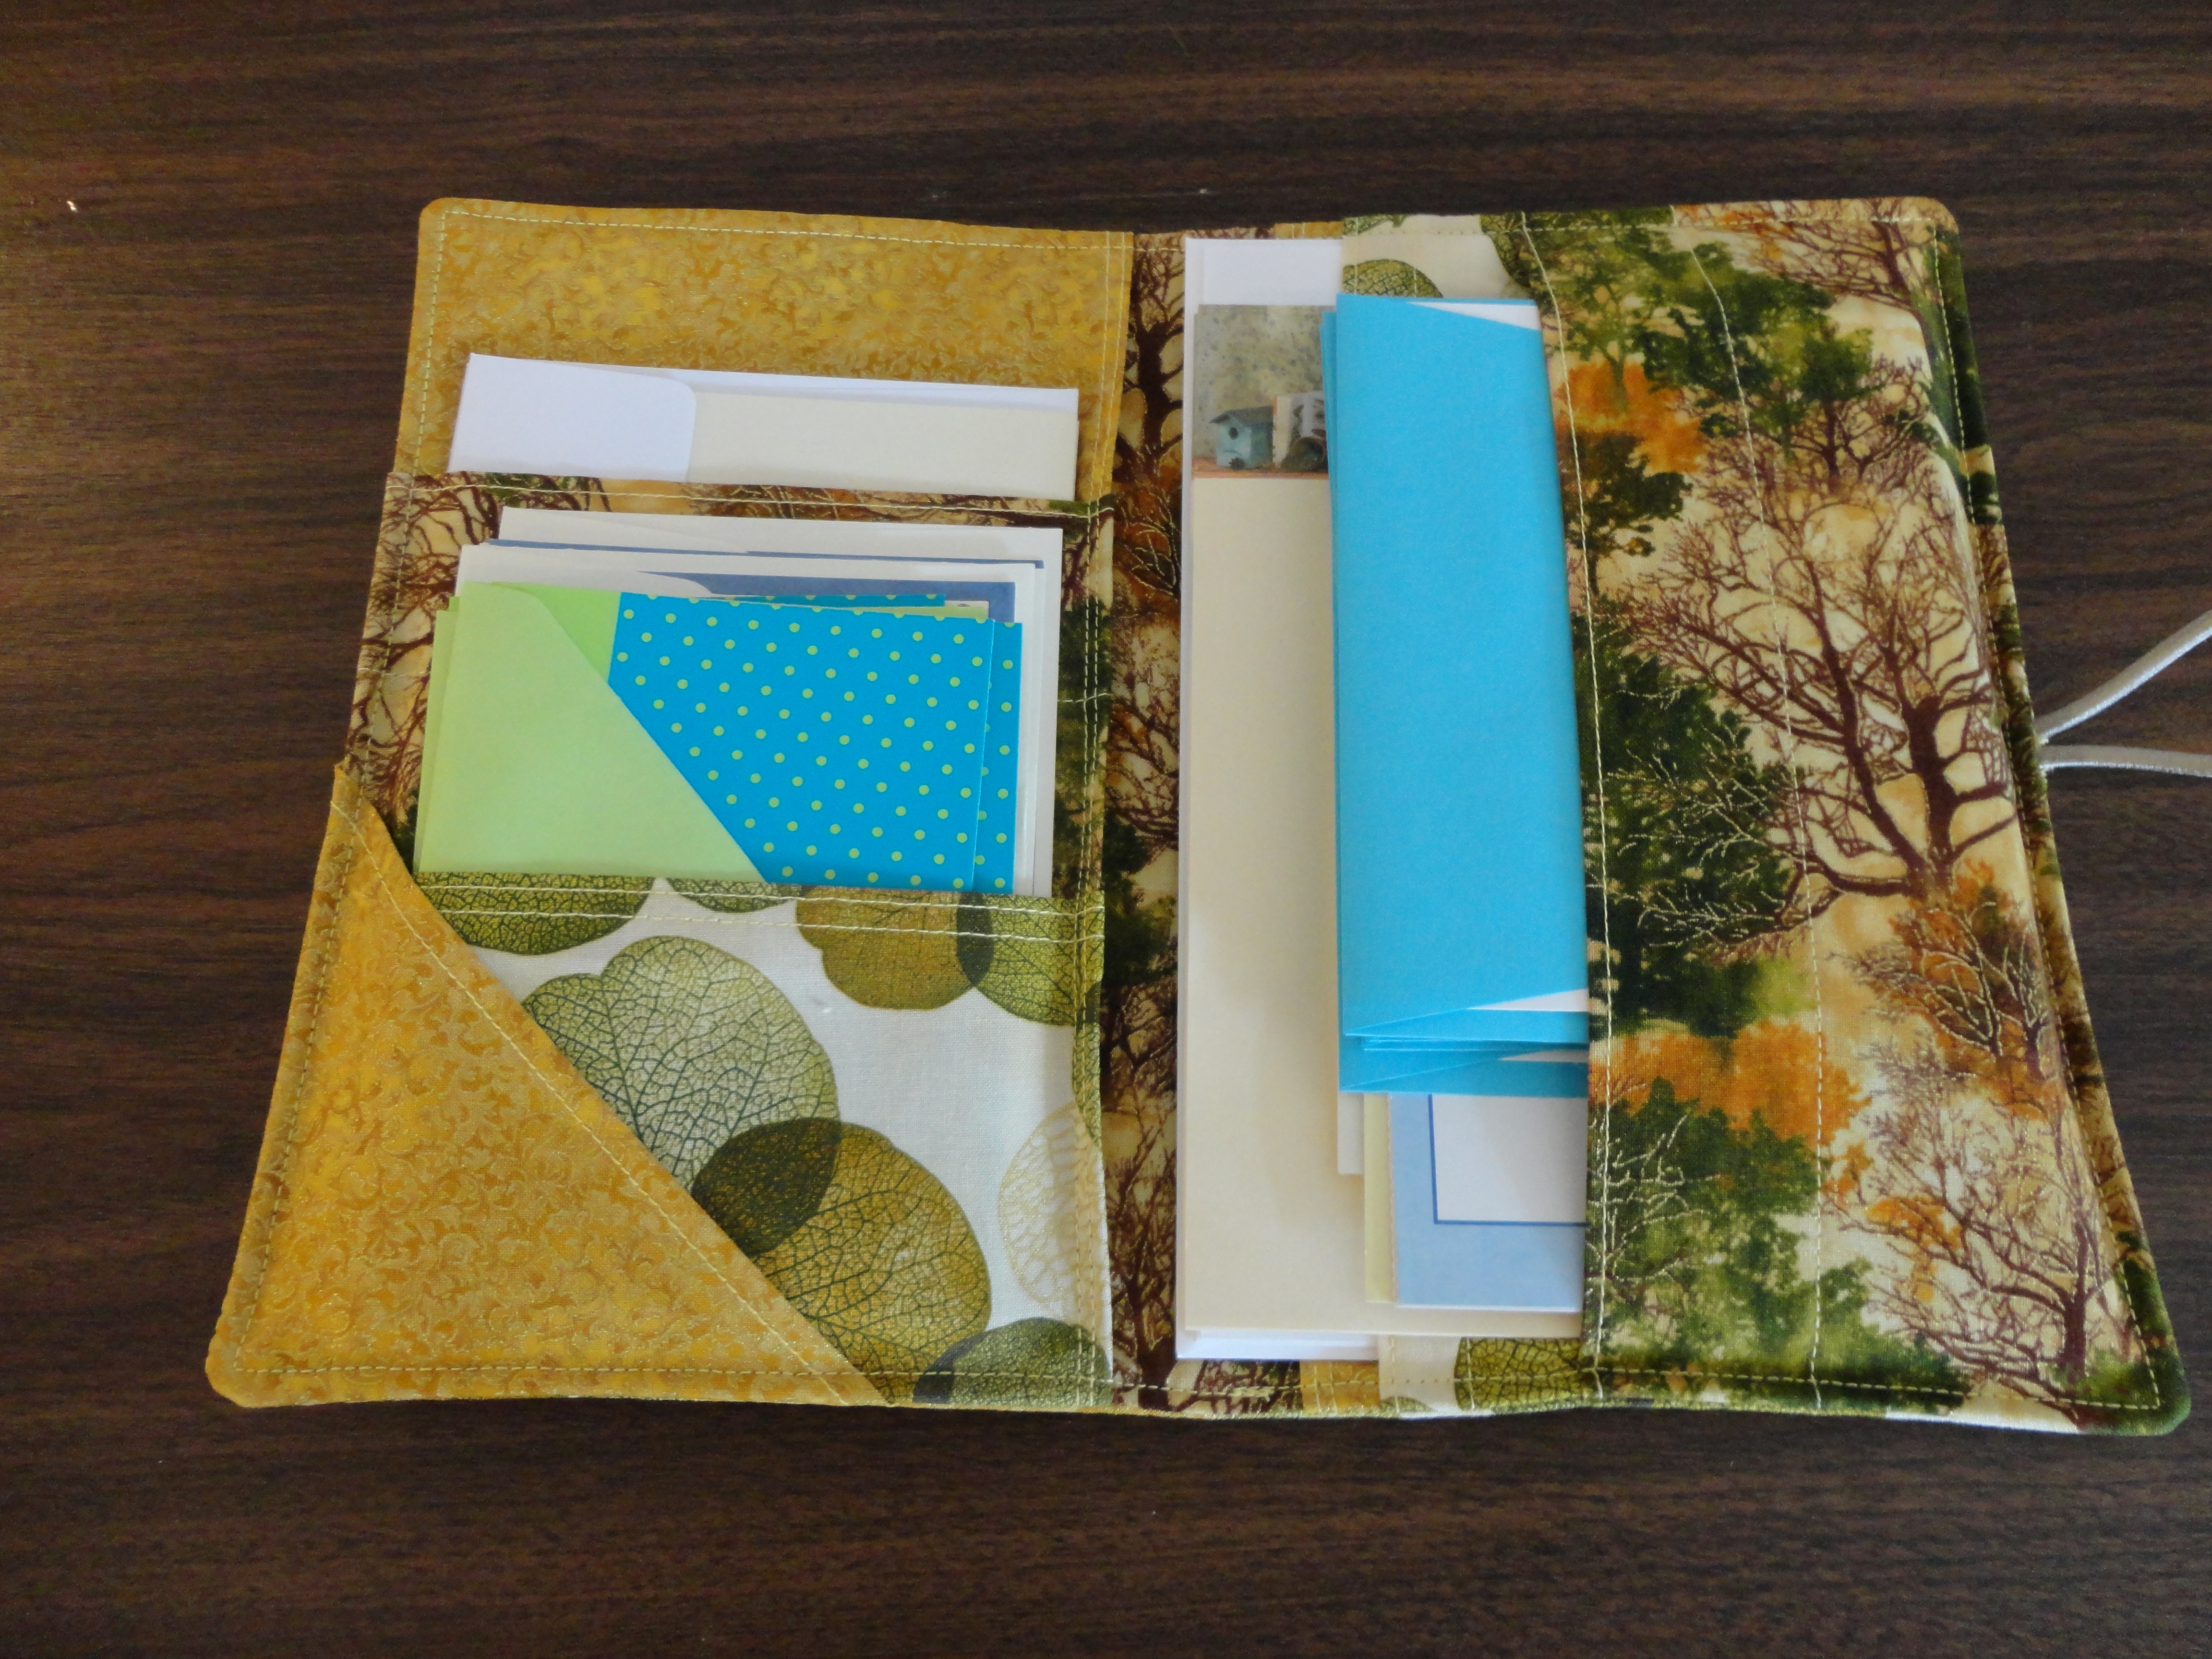
Here is a Stationery Holder. I found a lot of pictures online but no real directions so I created my own! This is just the right size to carry in a purse (if you are like me and have a large purse) or a briefcase. How many times have you said, “Gee, I should write so-and-so a note.” but didn’t have any stationery or cards handy, then by the time you got home you’d forgotten all about it. Well, not now! This way all the supplies – including stamps and a place to store addresses – will always be handy.
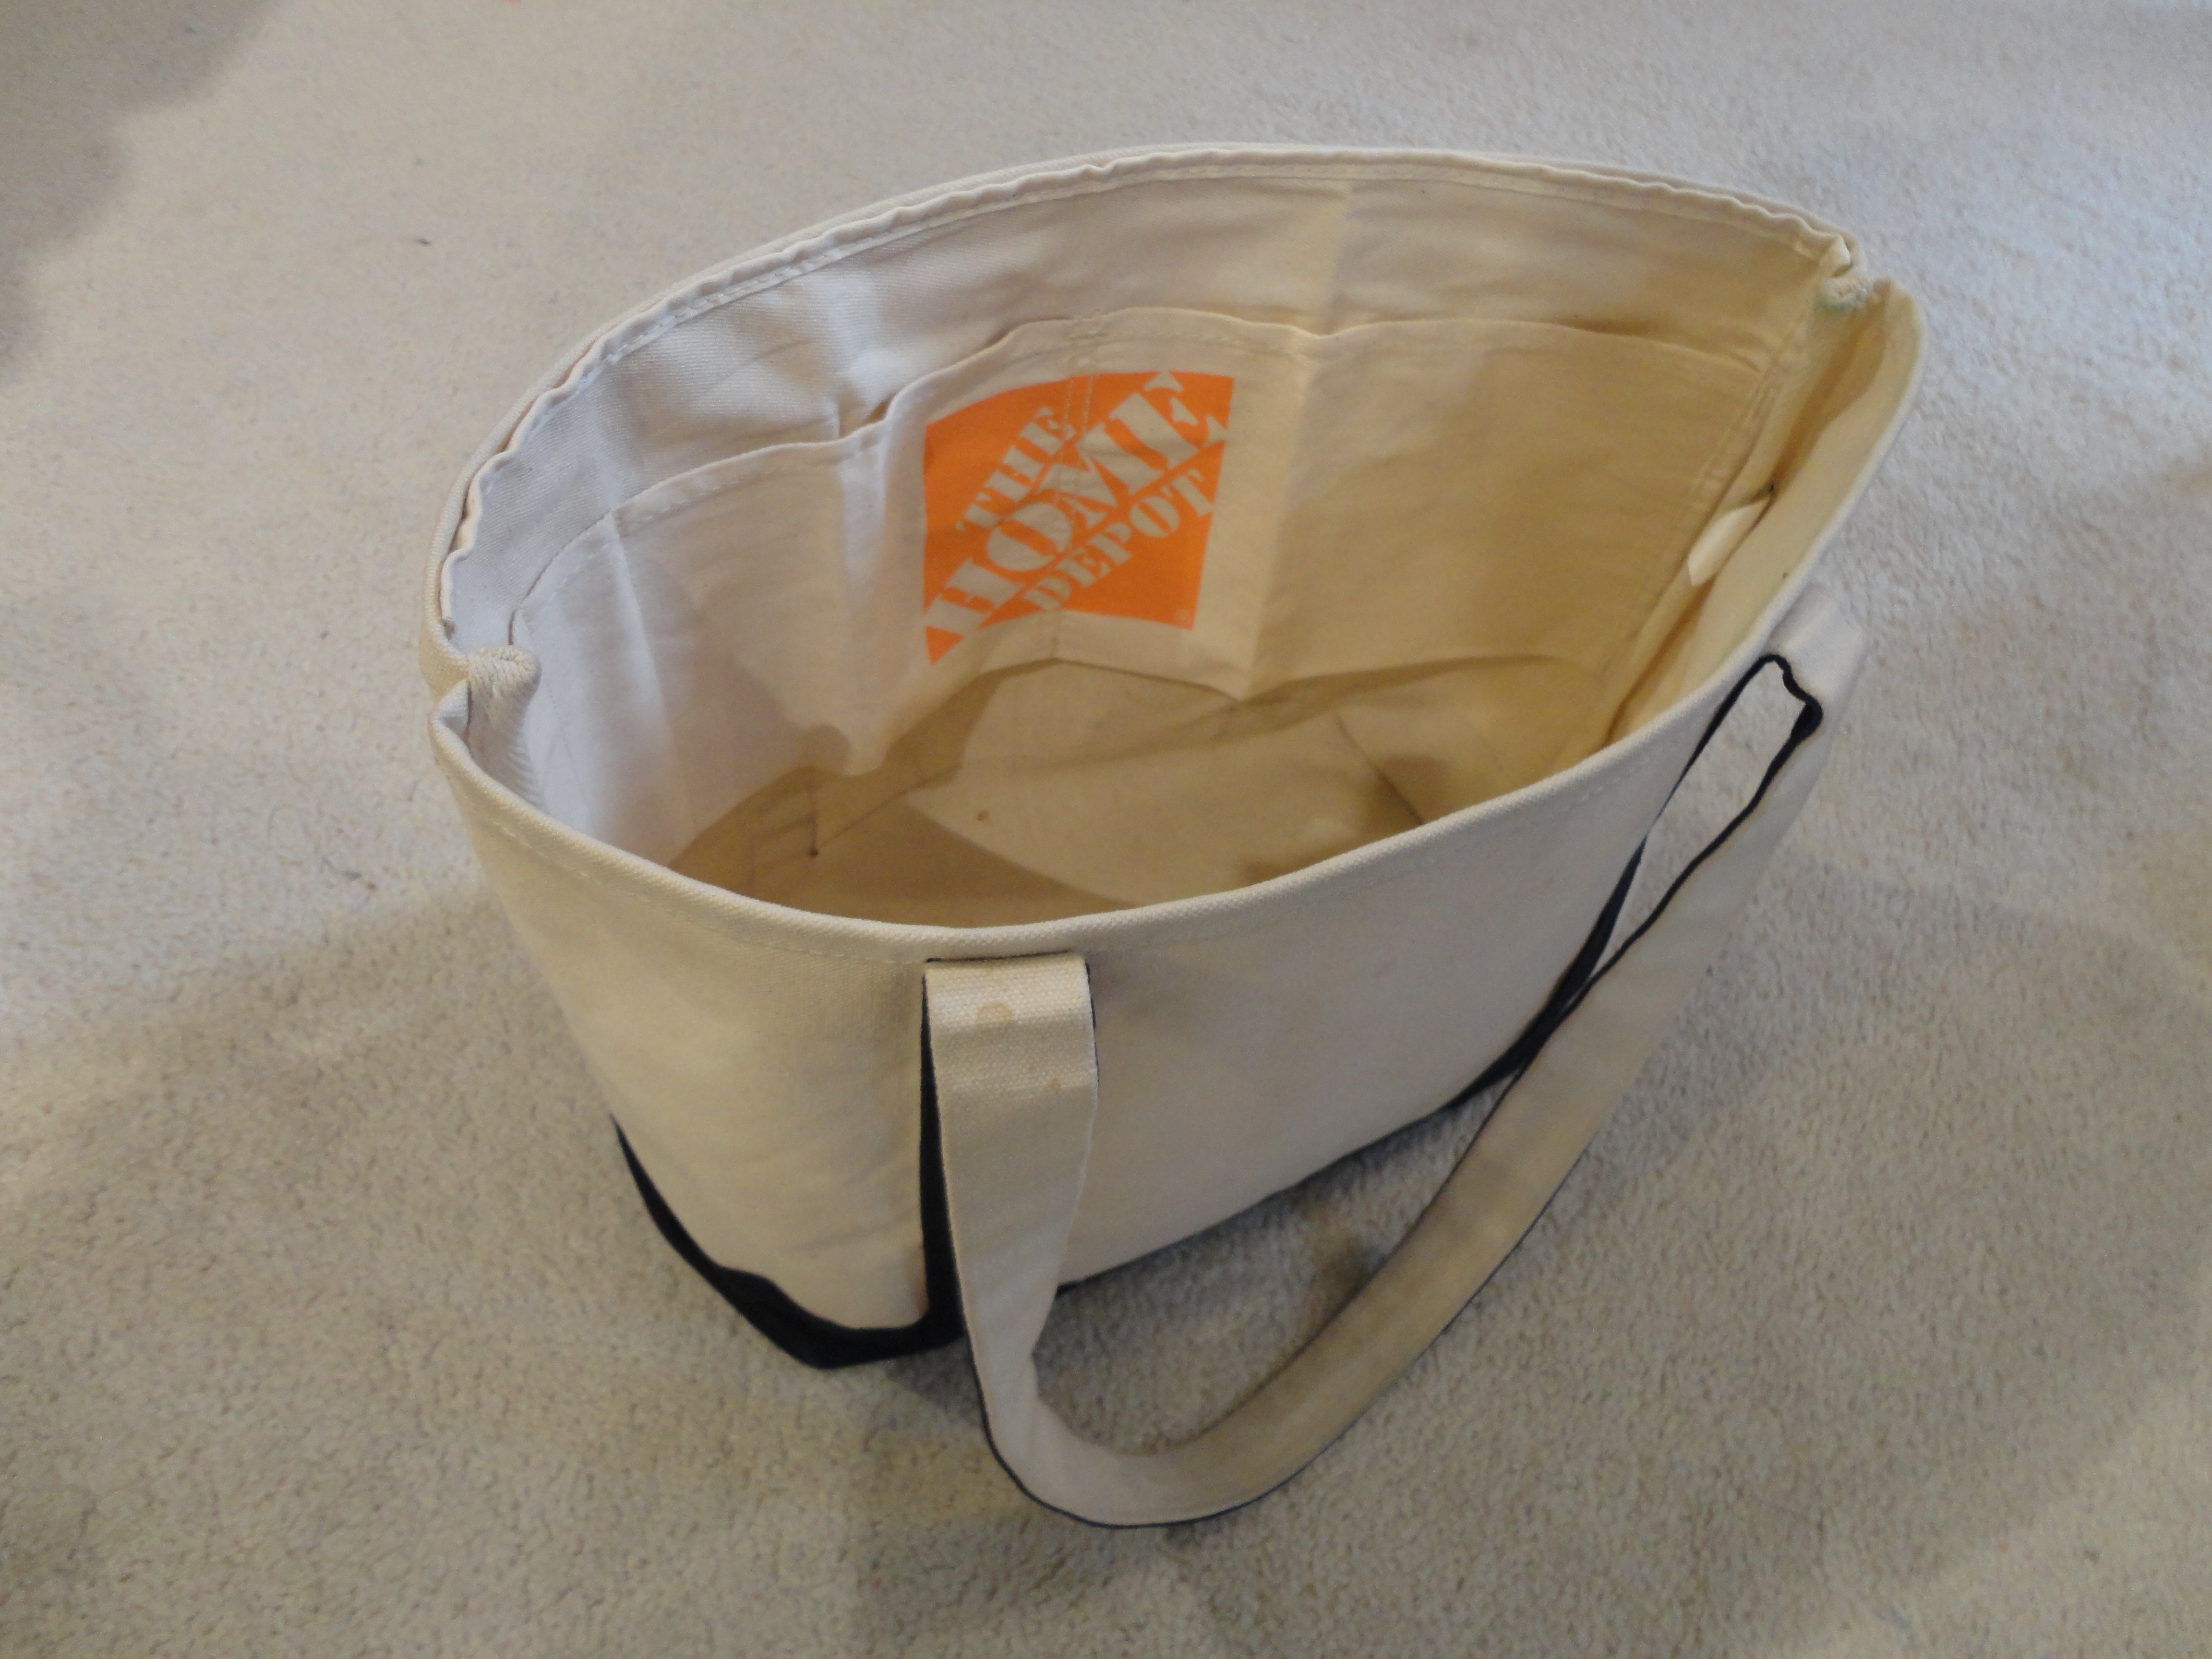
This next project I actually made at the Indiana State Quilt Guild summer (a couple weeks ago). I’m calling it an organzier bucket. It has pockets all around the inside to hold all kinds of things. At the retreat I used it to hold toiletries but it could also be used to hold sewing supplies or office supplies or whatever else needs to be organized.

And the last project I made is a Zippy Strippy Quilt (this is just the quilt top). Usually the strips are sewed end to end with a diagonal seam, but I used a black square instead. The squares really added some interest.

Jane’s Running T-Shirt Quilt
This was a great collection of running t-shirts from events all across the country. She picked it up a couple weeks ago but I’ve been so busy I haven’t had a chance to post it yet. So…here it is:

It turned out so wonderful and she was so pleased with it.
Running t-shirts quilt
You would think with all the rain we’ve had here in the midwest that I would have lots of time to be quilting. Somehow that didn’t work out. However, I did spend a lot of time working on organizing my sewing / quilting studio, affectionately known as Wandaland. We just moved last June and I still have so much of my stuff in boxes and the room was just “not working.” It wasn’t configured for how I needed it to work. So we (my husband and I) took out the mismatched bookcases and put shelves on three walls and rearranged the rest of the furniture. Finally – I have unpacked lots of boxes, put supplies where I can find them, and now the room “flows” like it should. Don’t get me wrong, there are still a lot of boxes to unpack (see background in the photo), but those will have to wait for another rainy day.
Here is a picture of the current t-shirt quilt I’m working on. I should have had it done a couple weeks ago, but I thought it best to get the studio organized first. Then to work on this quilt was a dream.
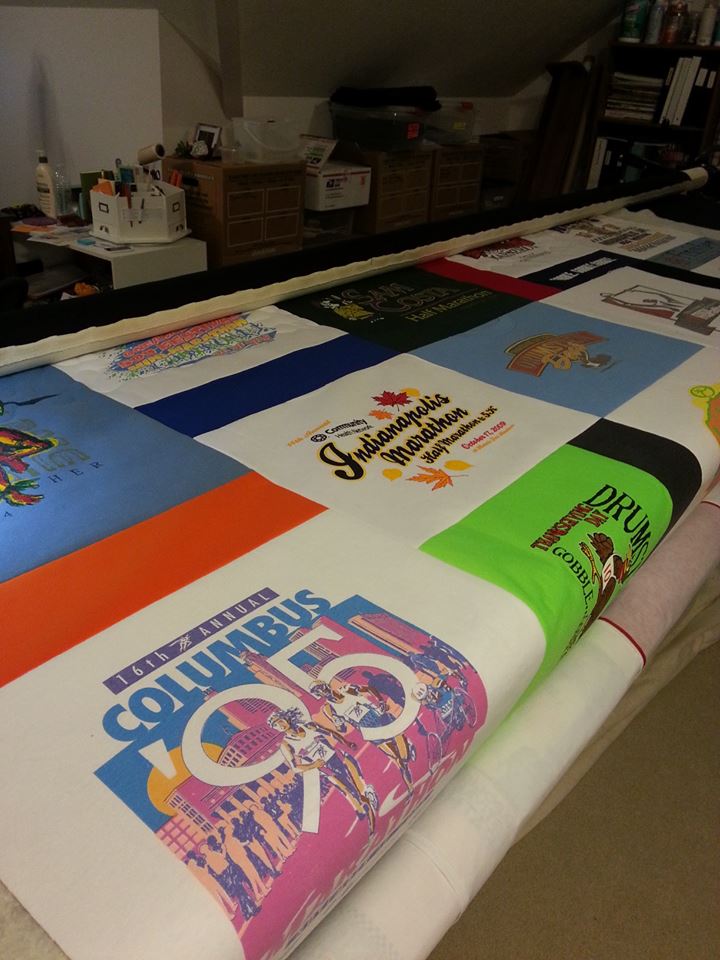
She has a great collection of running t-shirts from half and full marathons from all over the country. Gonna be awesome!
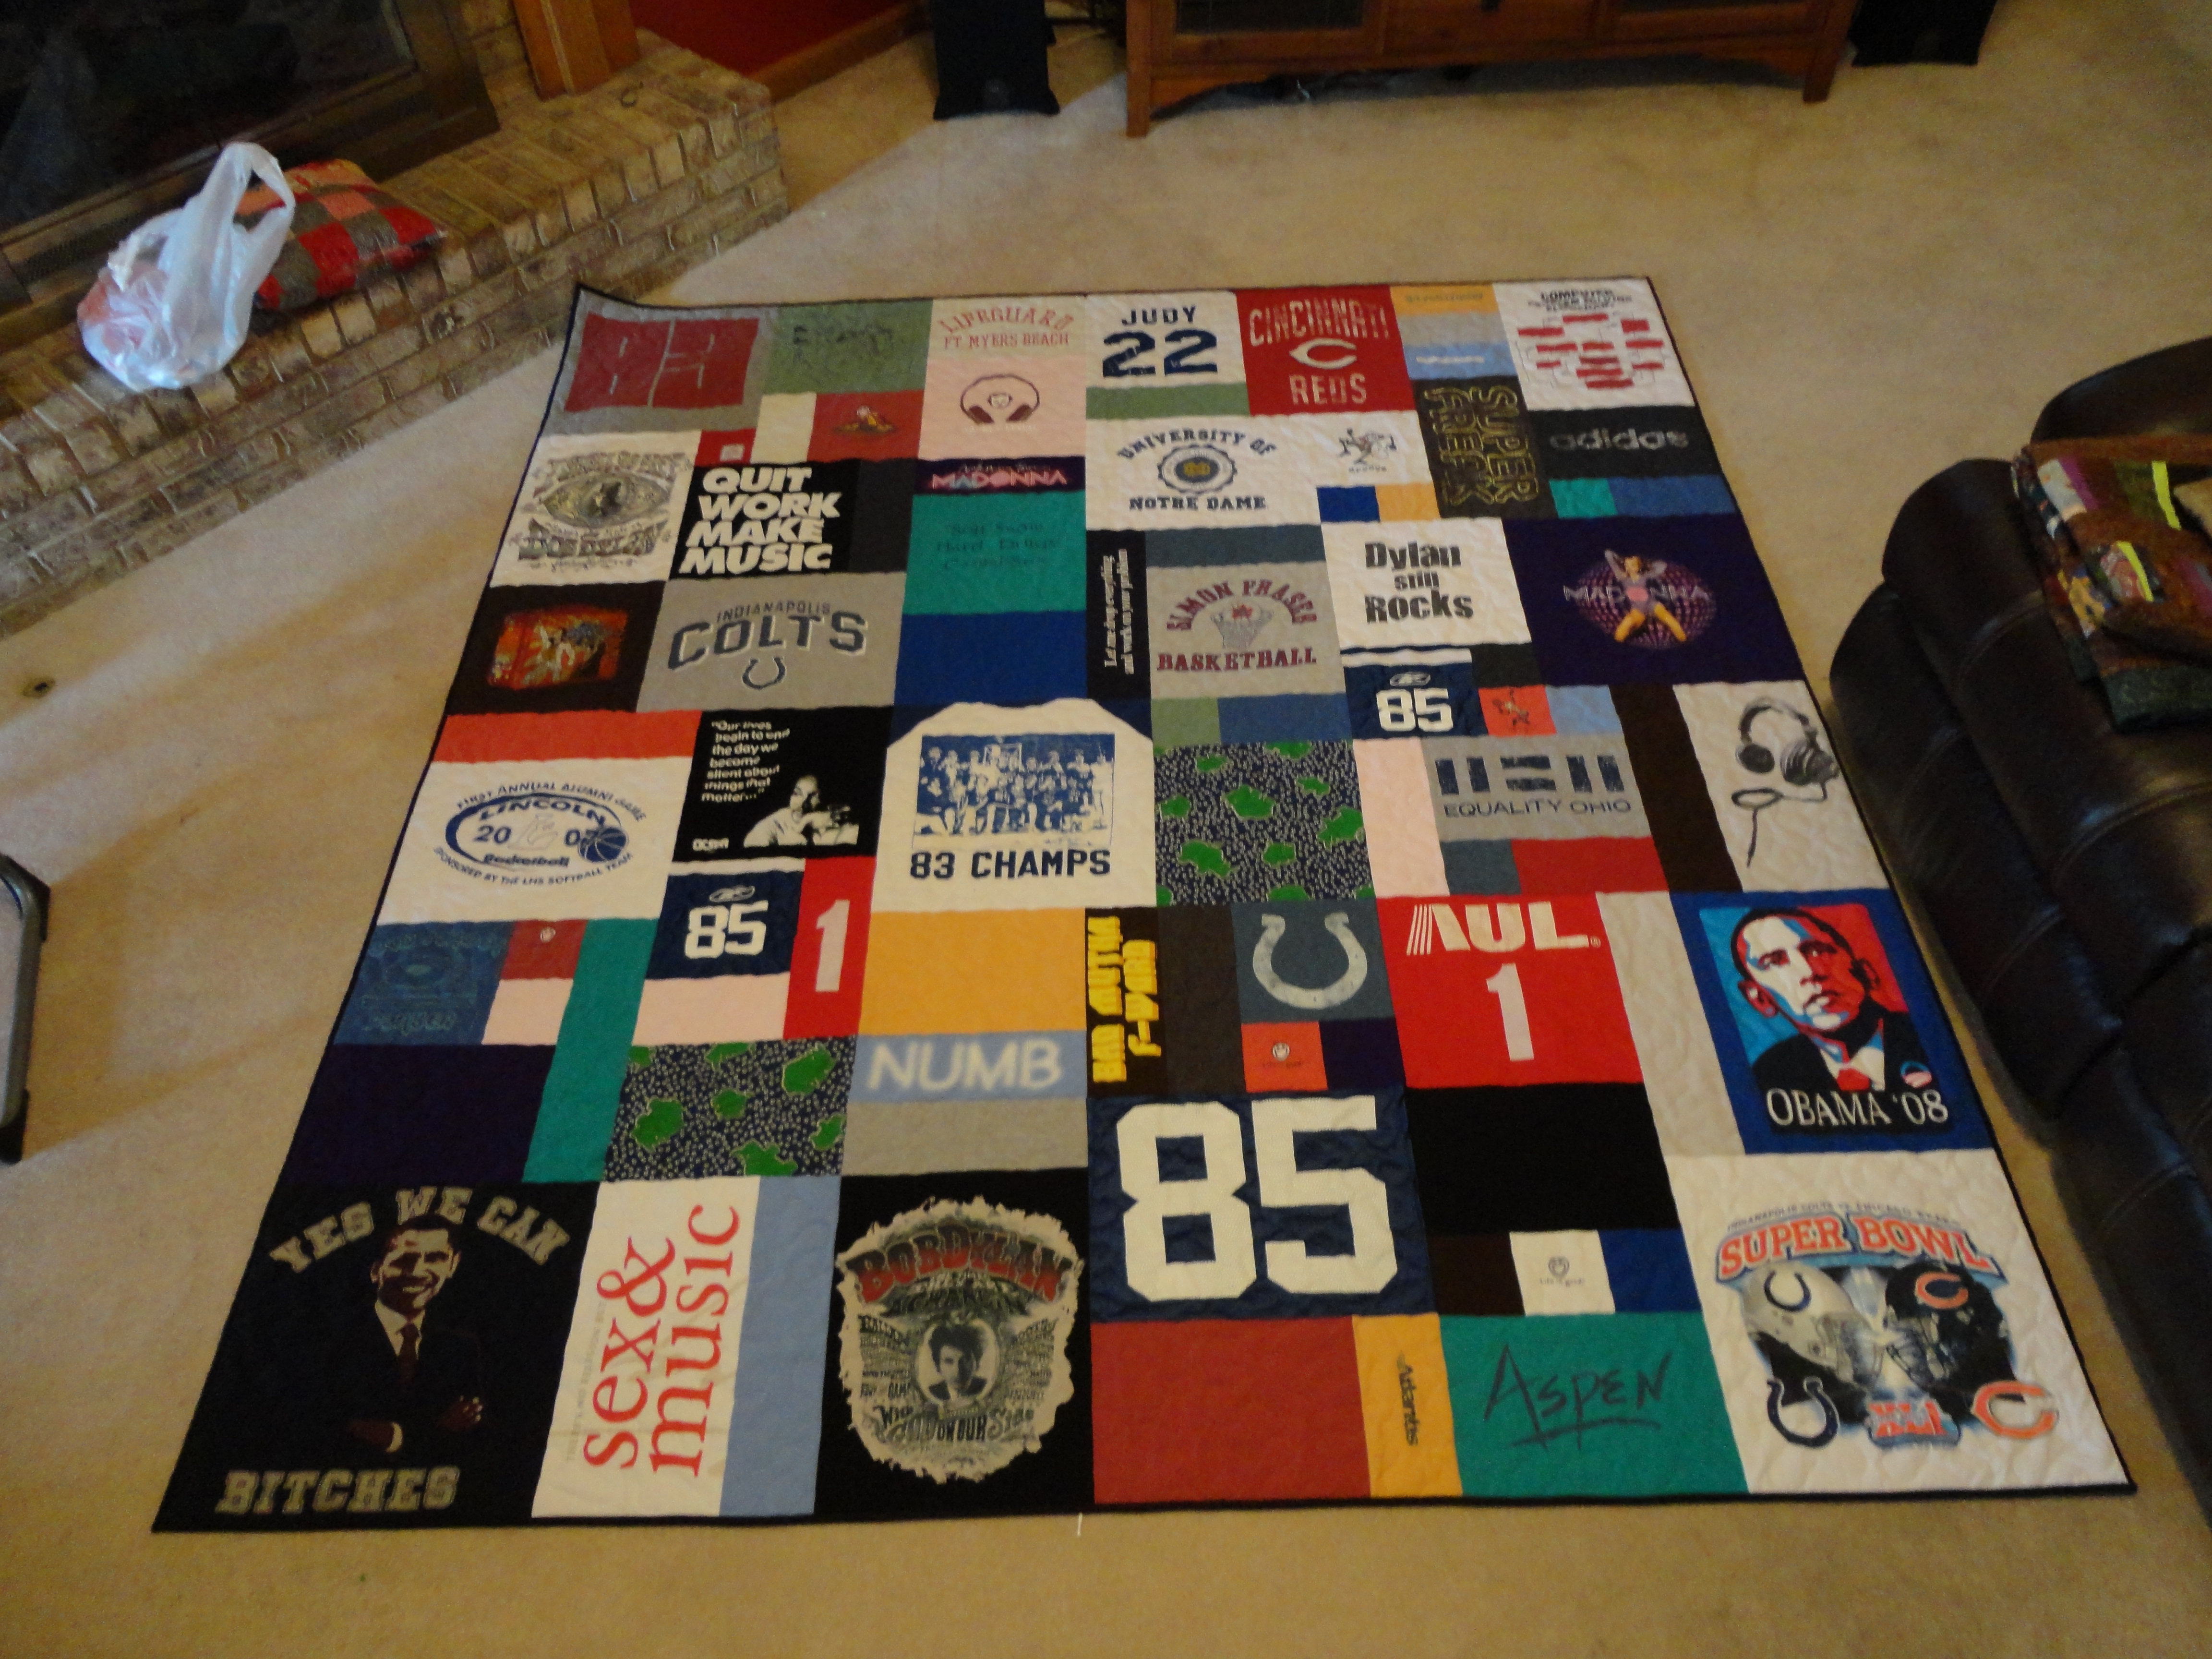
Judy’s Favorite T-Shirts
These are Judy’s favorite t-shirts and they’ve been made into a beautiful t-shirt quilt. What a great keepsake. Since she had so many it was difficult for her to decide which ones to include and which ones to set aside. Before the quilt was delivered to her, she would often go to her closet to pull out one of her favorites only to find it missing. Now they are all safely back in her posession for her to enjoy for many years to come.
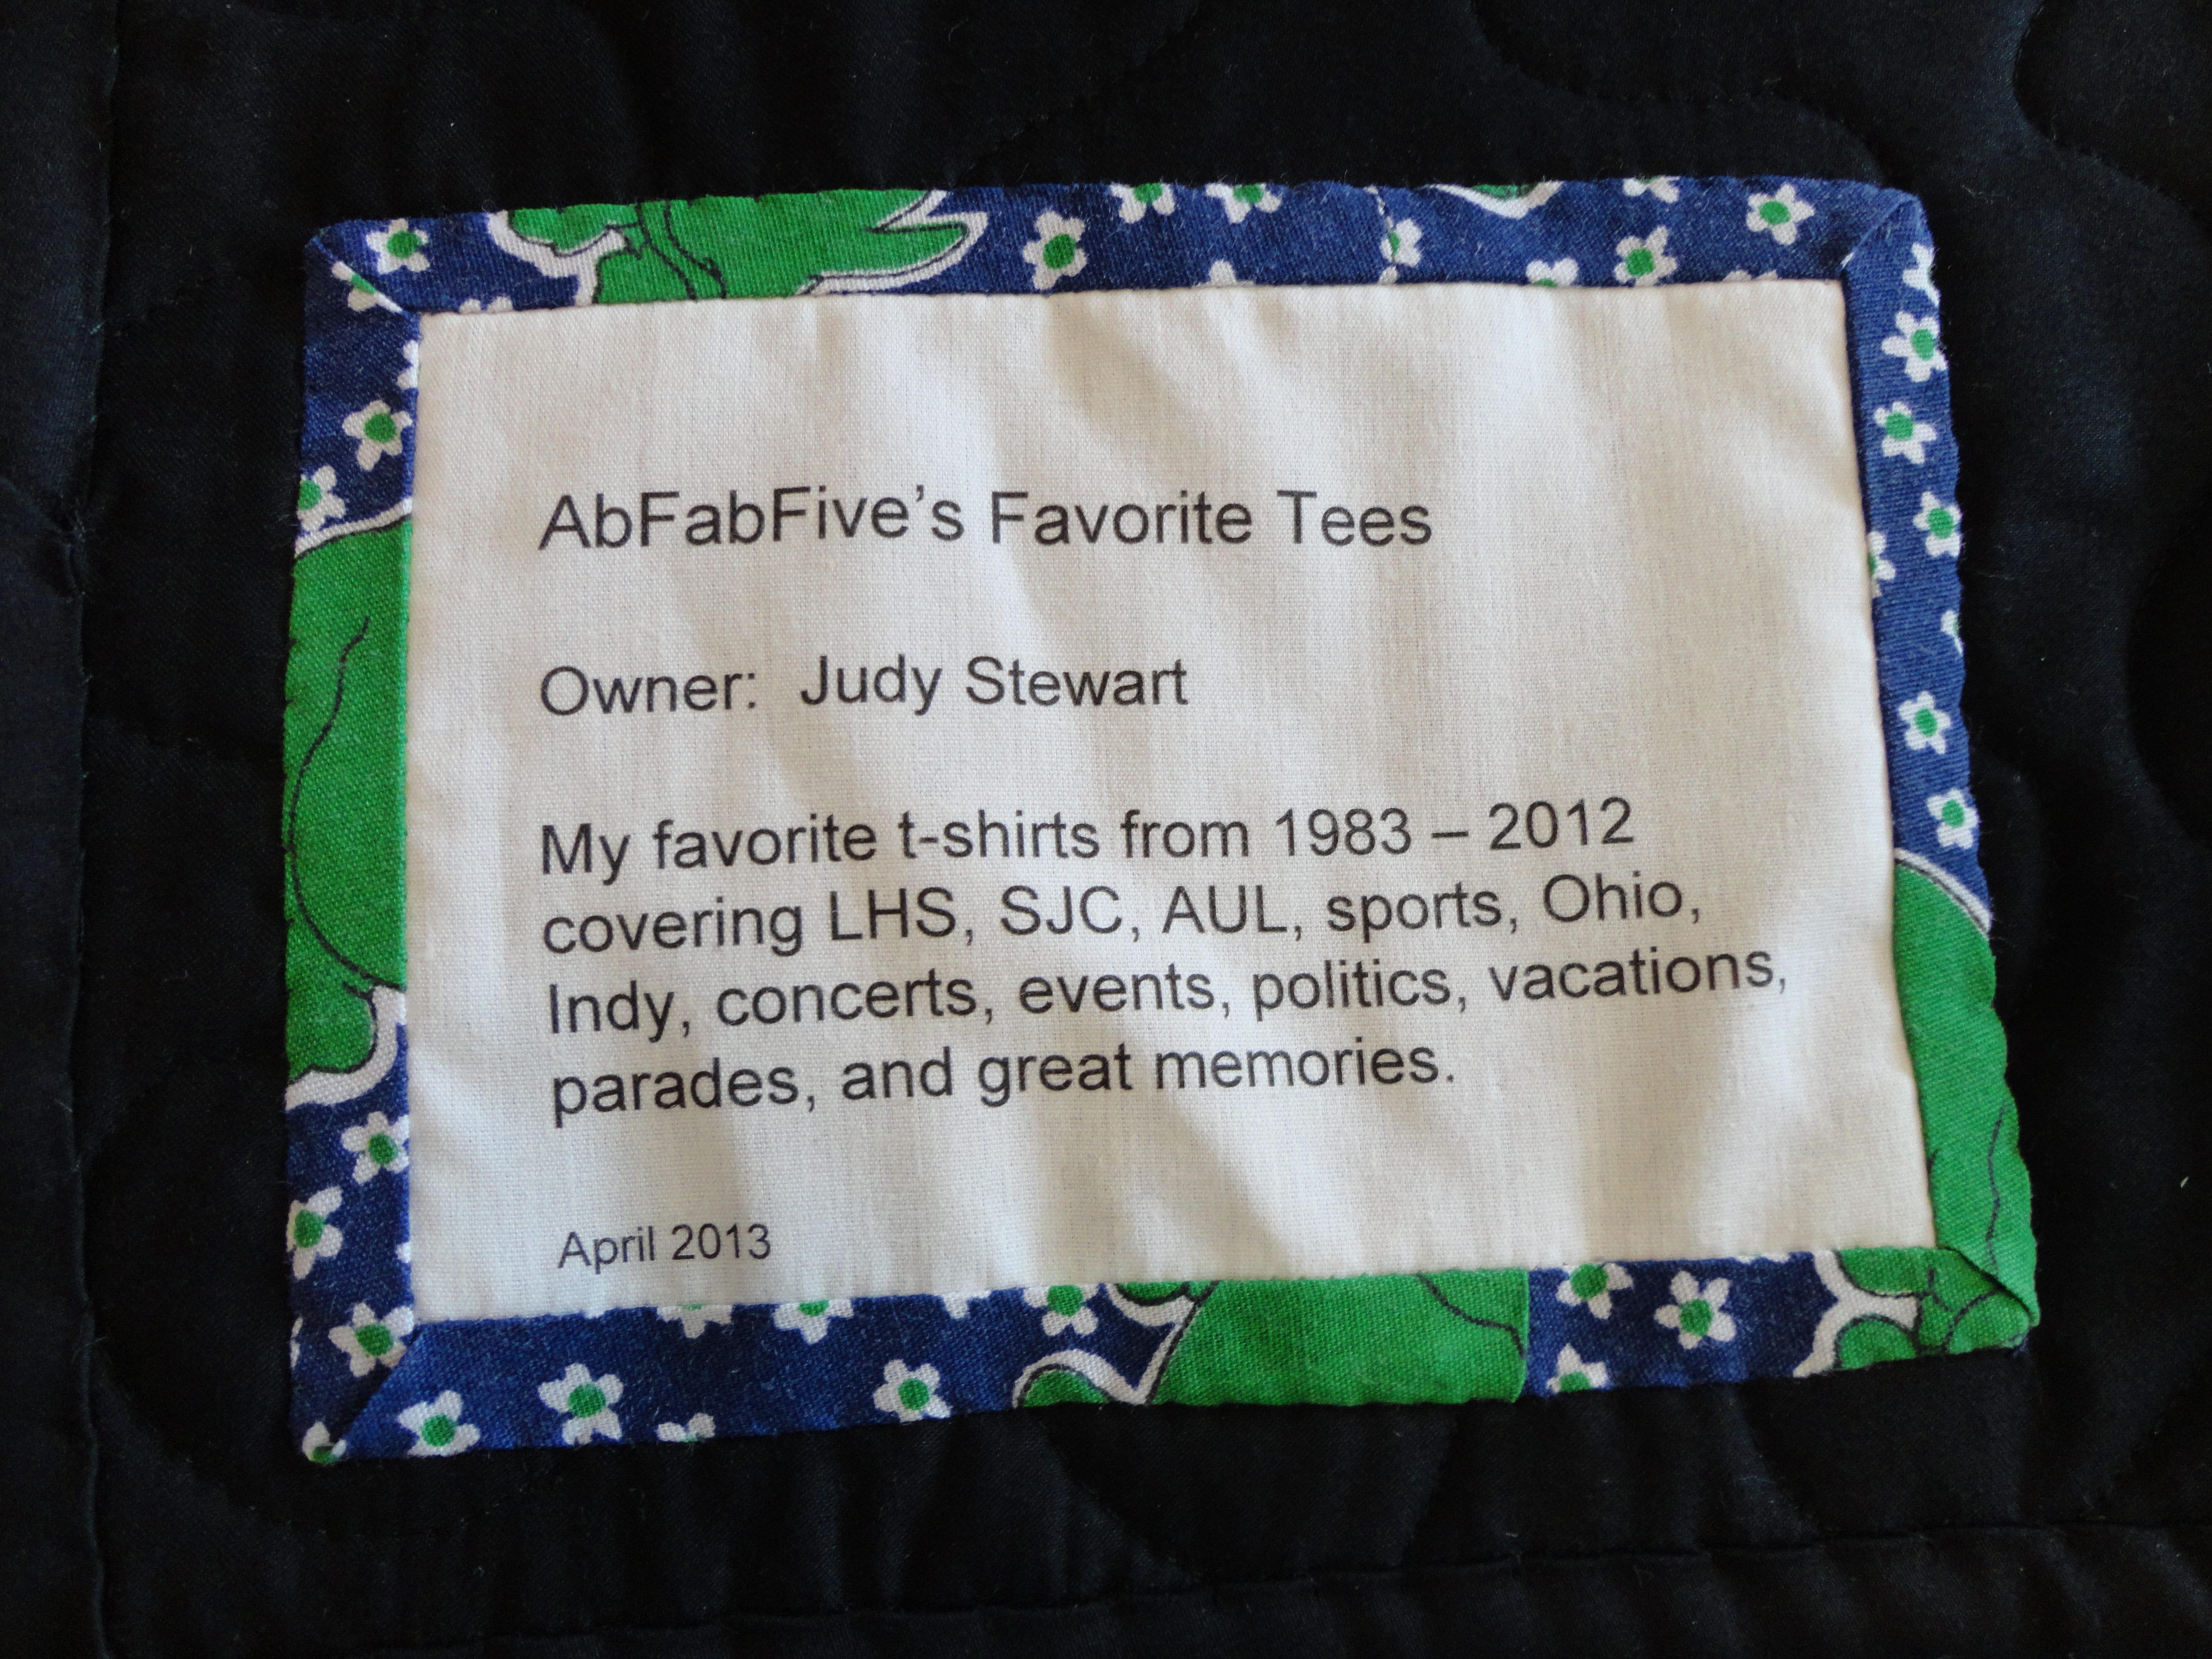
This is the quilt label – it’s bordered in some fabric that is special to Judy.
I had a great time making this quilt. I could tell some t-shirts were her favorite because they were so soft and almost worn out!
Keep warm Judy!
Mug Rug
This is a mug rug I made for my friend and neighbor, Flo. I know she loves her coffee and this will be a perfect little gift for her. In case you don’t know what a mug rug is, just think of it as a fancy quilted coaster.
For this one I started with a pre printed quilt label which can be purchased as a panel from a quilt store. Then I pulled some matching fabrics from my ever growing fabric stash to complete the little quilt top. I added a couple applique stars, too, because they kind of match the star flower on the quilt label. I used some variegated thread and did some fun quilting in each of the sections of the mug rug. I had great fun making this and I hope Flo smiles every time she uses it.

Big Fluffy Flying Geese
First, let me explain the name. Big Fluffy because the white fabric is a type of chenille fabric. Very soft and fluffy. Yes, once again it was a mess to work with, but oh so worth it! It’s wonderful to lay on – like for watching tv. Flying Geese is the name of the pieced portion of the quilt. So, I put the two together and it came out – Big Fluffy Flying Geese. Works for me. I made the quilt top at the Indiana State Quilt Guild winter retreat in Nashville, IN. Once home and unpacked, I put this on the quilting machine and quilted it in a couple hours. But let me tell ya, even though I used variegated thread in the top thread and in the bobbin (bottom thread) I couldn’t tell where I had aleady quilted! I even turned off the light in the room and just used the light on the machine to see if that helped – no such luck. It was more of trying to remember where I had already sewed. But, as you can see, it turned out great!

Also, this was my attempt at “Modern Quilting” which is a new style in the quilting world. It uses lots of negative space, solid colors, and big bold designs. Even though it’s out of my comfort range, I think I did ok.
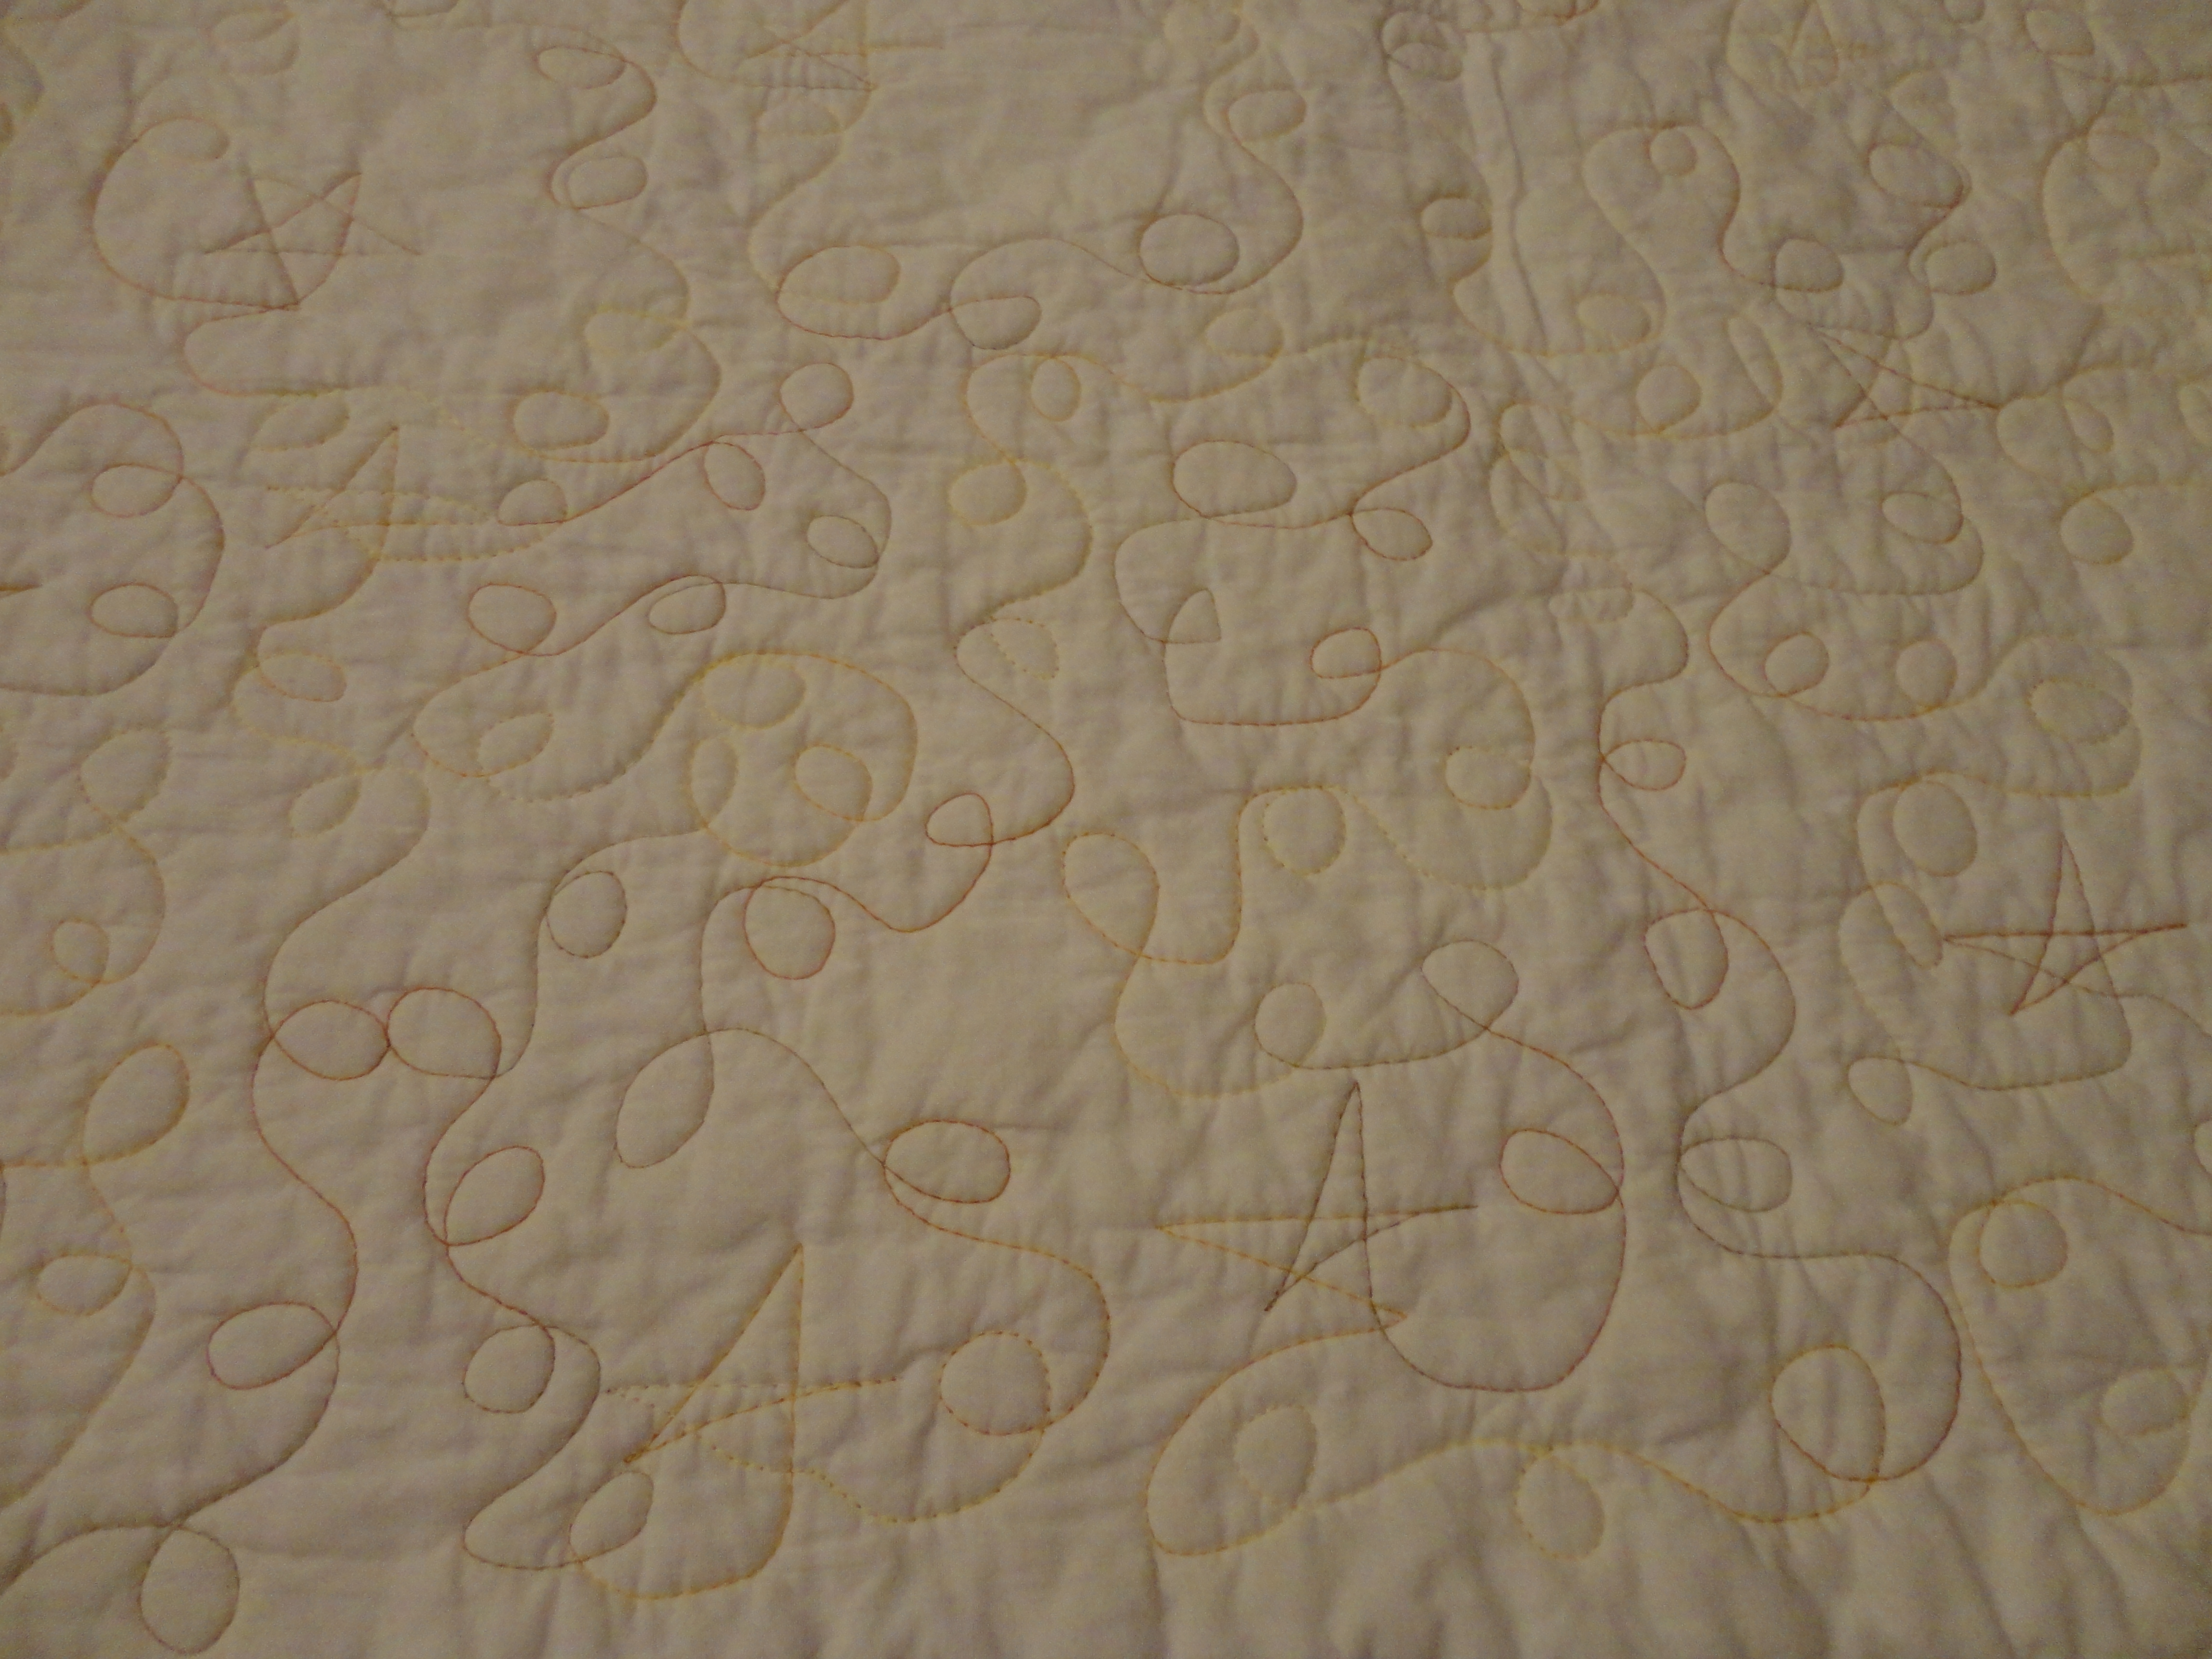
Here is a picture of the back of the quilt…

I mentioned earlier that I had trouble seeing the quilting thread from the top, but as you can see from the back detail, I think I did just fine…
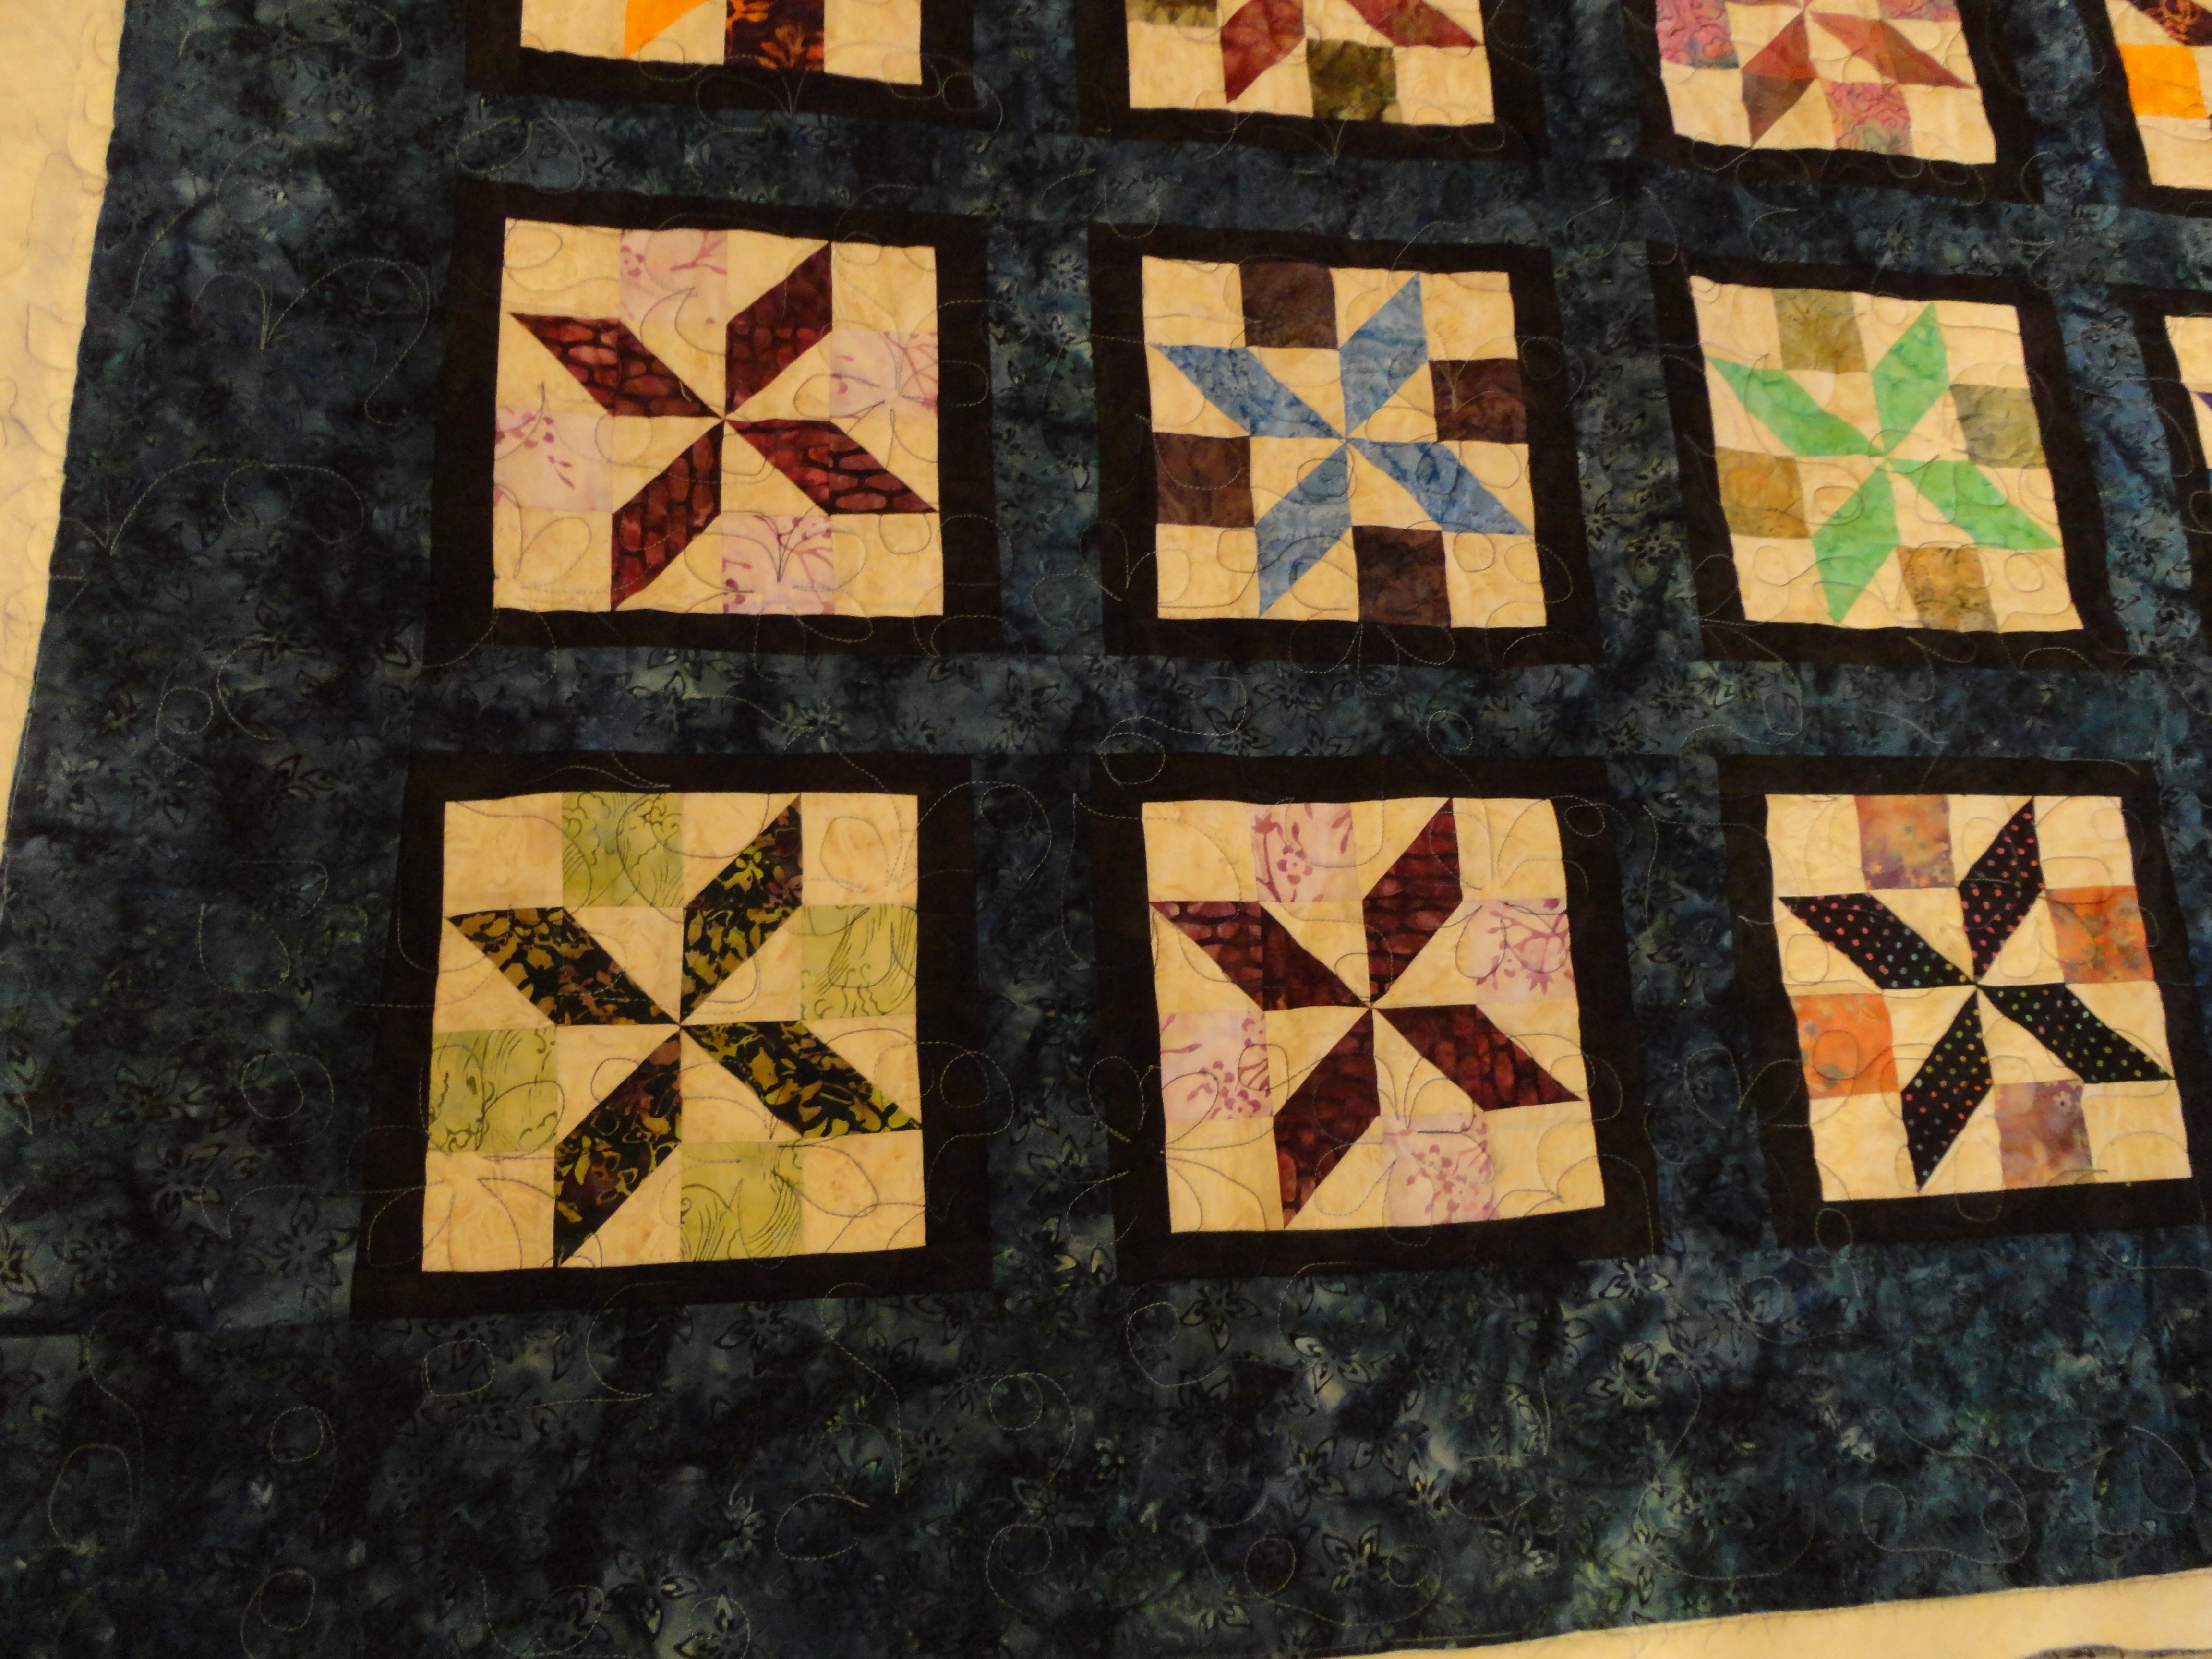
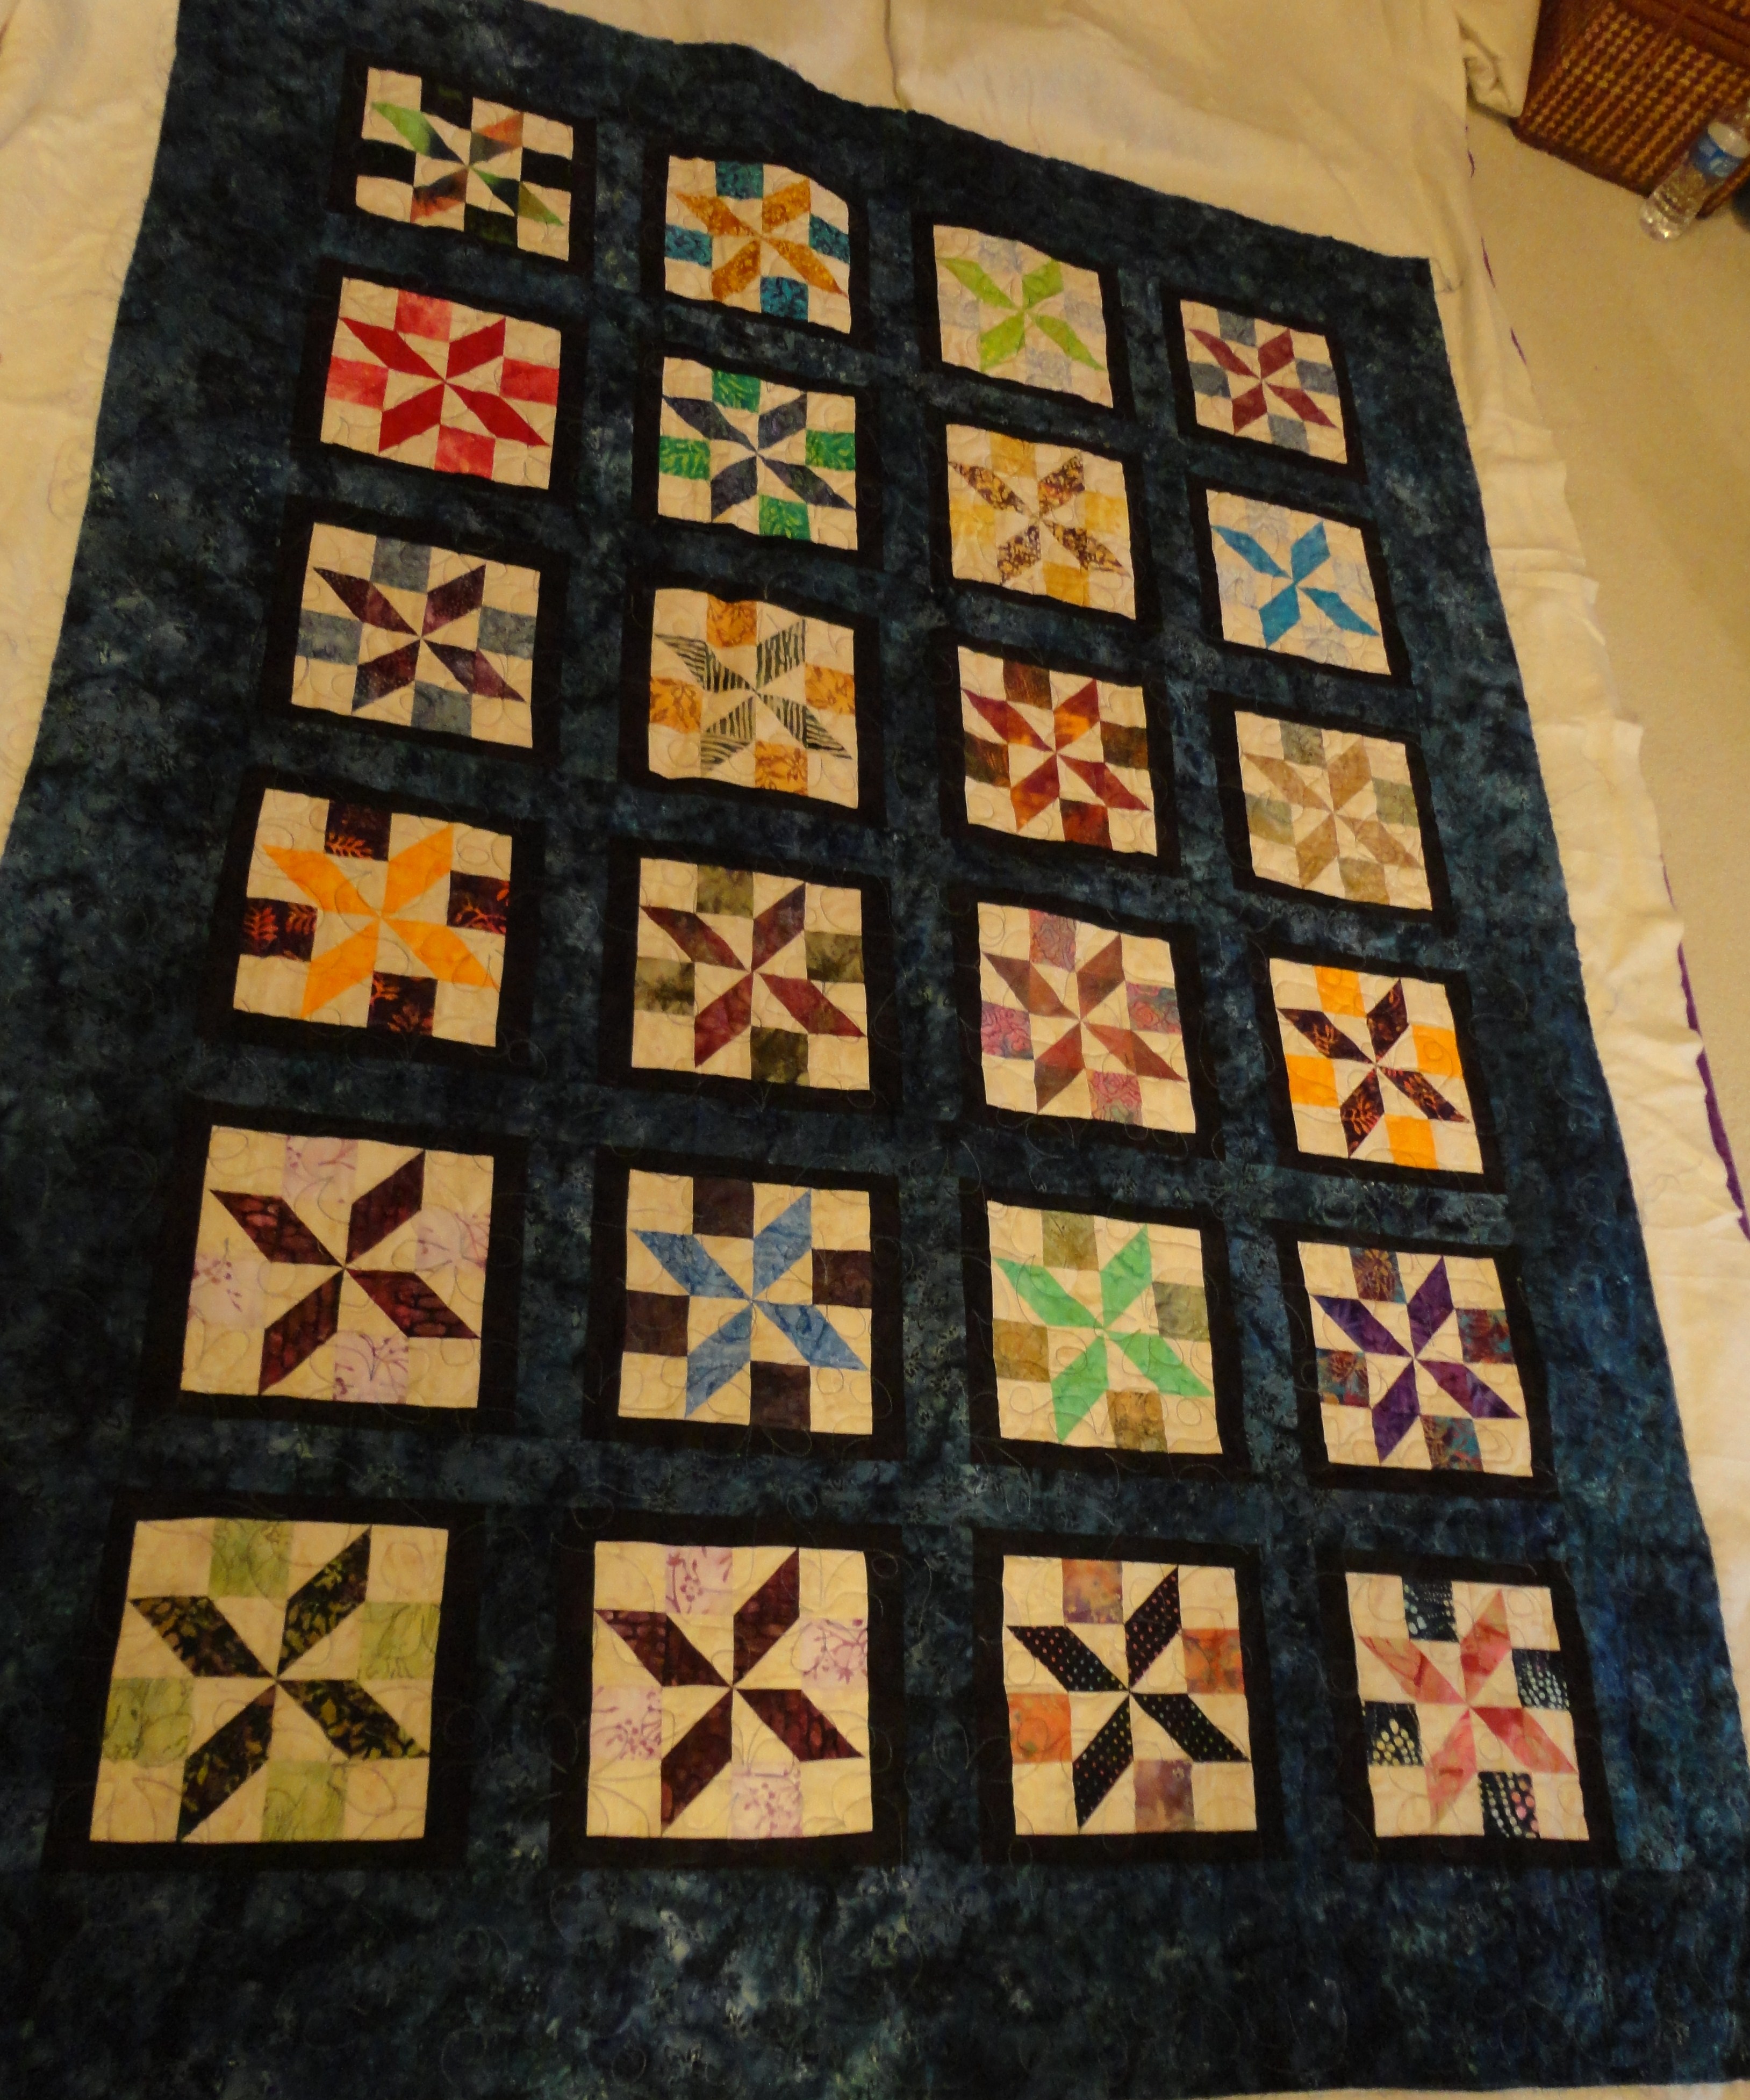
Janet’s Batik Quilt
This is my sister’s batik quilt that I quilted for her. She was in the same block exchange as Shelley. (I was in that group, too, but I don’t have mine quilted yet.) This turned out so beautiful.
This is a close up of the quilting…